Summary
To send information from your Gravity Forms form to the AWeber service, you will first need to create a feed. The feed will tell Gravity Forms what list you want to submit to, how you want the fields to be mapped, and under what conditions you wish for the entry to be sent to the service. This article describes the steps to create a basic feed to AWeber.
Create a Feed
To create a feed to AWeber using the AWeber Add-On for Gravity Forms, do the following from your WordPress Admin Dashboard:
- Click on Forms in the left side menu.
- Select the form that you want to use with AWeber.
- Once within your desired form, hover over Form Settings and click on AWeber.
- Click Add New to create a new feed. You will be presented with the AWeber feed settings screen.
Feed Settings Reference
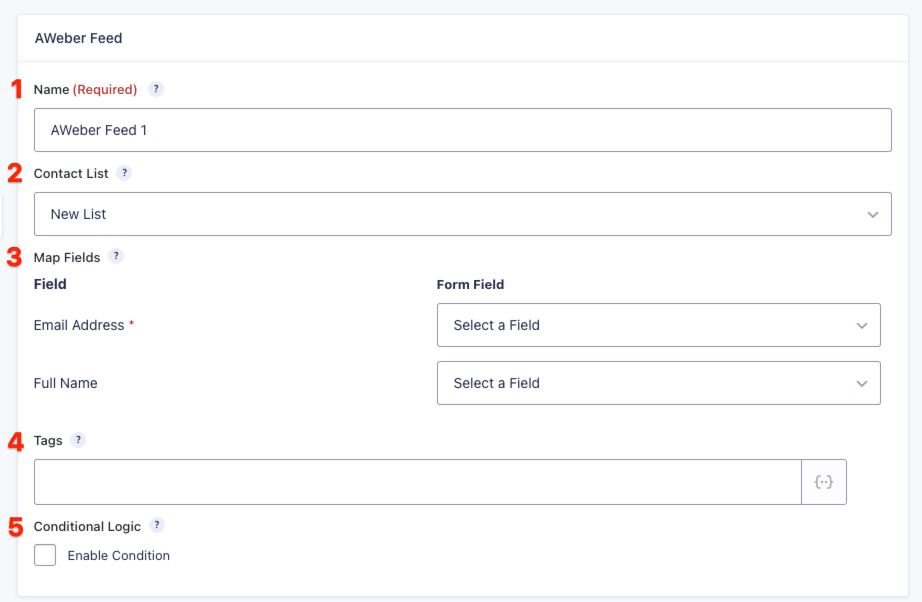
This table describes the feed settings options you will be offered for an AWeber feed.
| Setting | Description | Image Key |
|---|---|---|
| Name | To identify your feed when viewing the feed list page. Required | 1 |
| List | Select the AWeber contact list that you would like to add the subscriber to. Required | 2 |
| Map Fields | Map each of the contact list fields to the form field that will send that information. Email field is required. | 3 |
| Tags | Use merge fields or static values to populate the AWeber tags for each submission in the feed. Multiple tags must be separated using commas. | 4 |
| Conditional Logic | If unchecked, every successful form submission will be sent to AWeber. If you wish to set specific conditions for sending form data to AWeber, then check the “Enable Condition” box and fill out your required criteria. | 5 |