Introduction
The official Gravity Forms reCAPTCHA Add-On brings Google’s reCAPTCHA v3 technology as an addition to your anti-spam toolbox. This article describes how to configure the basic settings for use.
Settings Reference
For a full list of all the reCAPTCHA Add-On settings, refer to this guide.
Setting up reCAPTCHA v3 Enterprise
Note: Google Workspace organizations may enforce a reauthentication policy that requires users to reconnect OAuth-based applications frequently. Administrators can adjust these settings or mark the Gravity Forms reCAPTCHA connection as a trusted app to reduce the frequency of reauthentication prompts. For details, see Google’s Managing reauthentication documentation.
- Go to the Google Cloud Console and create a new Enterprise reCAPTCHA Key.
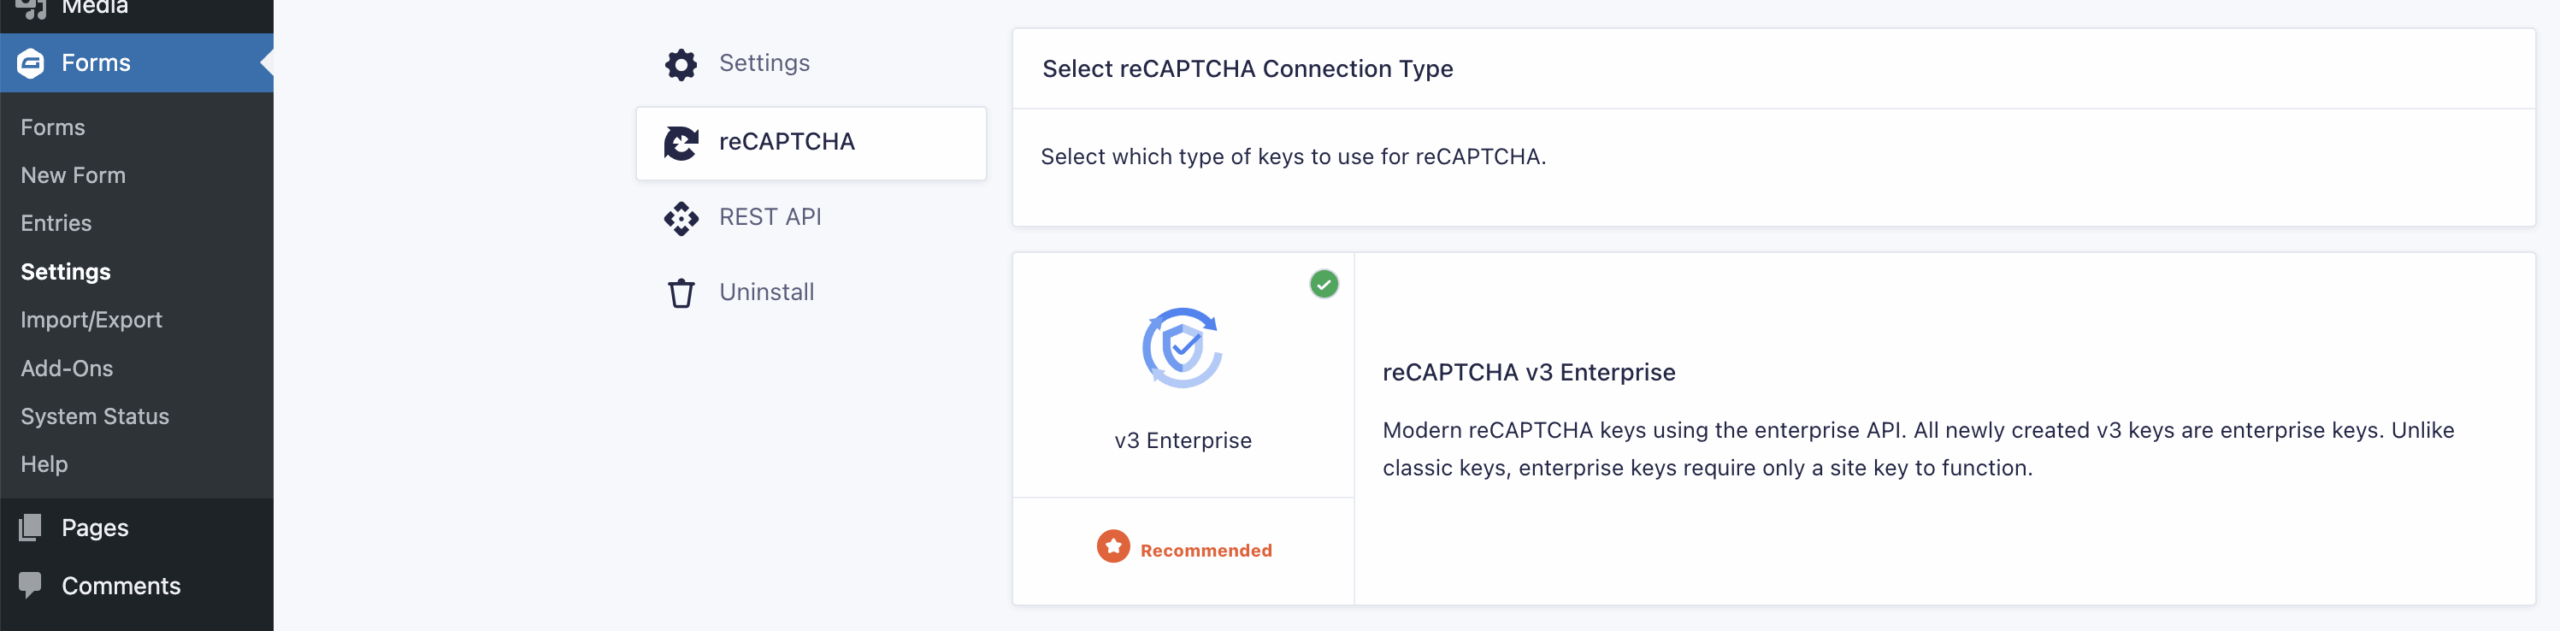
- Go to Forms → Settings → reCAPTCHA and select Enterprise as the connection type.
- Complete the OAuth flow when prompted.
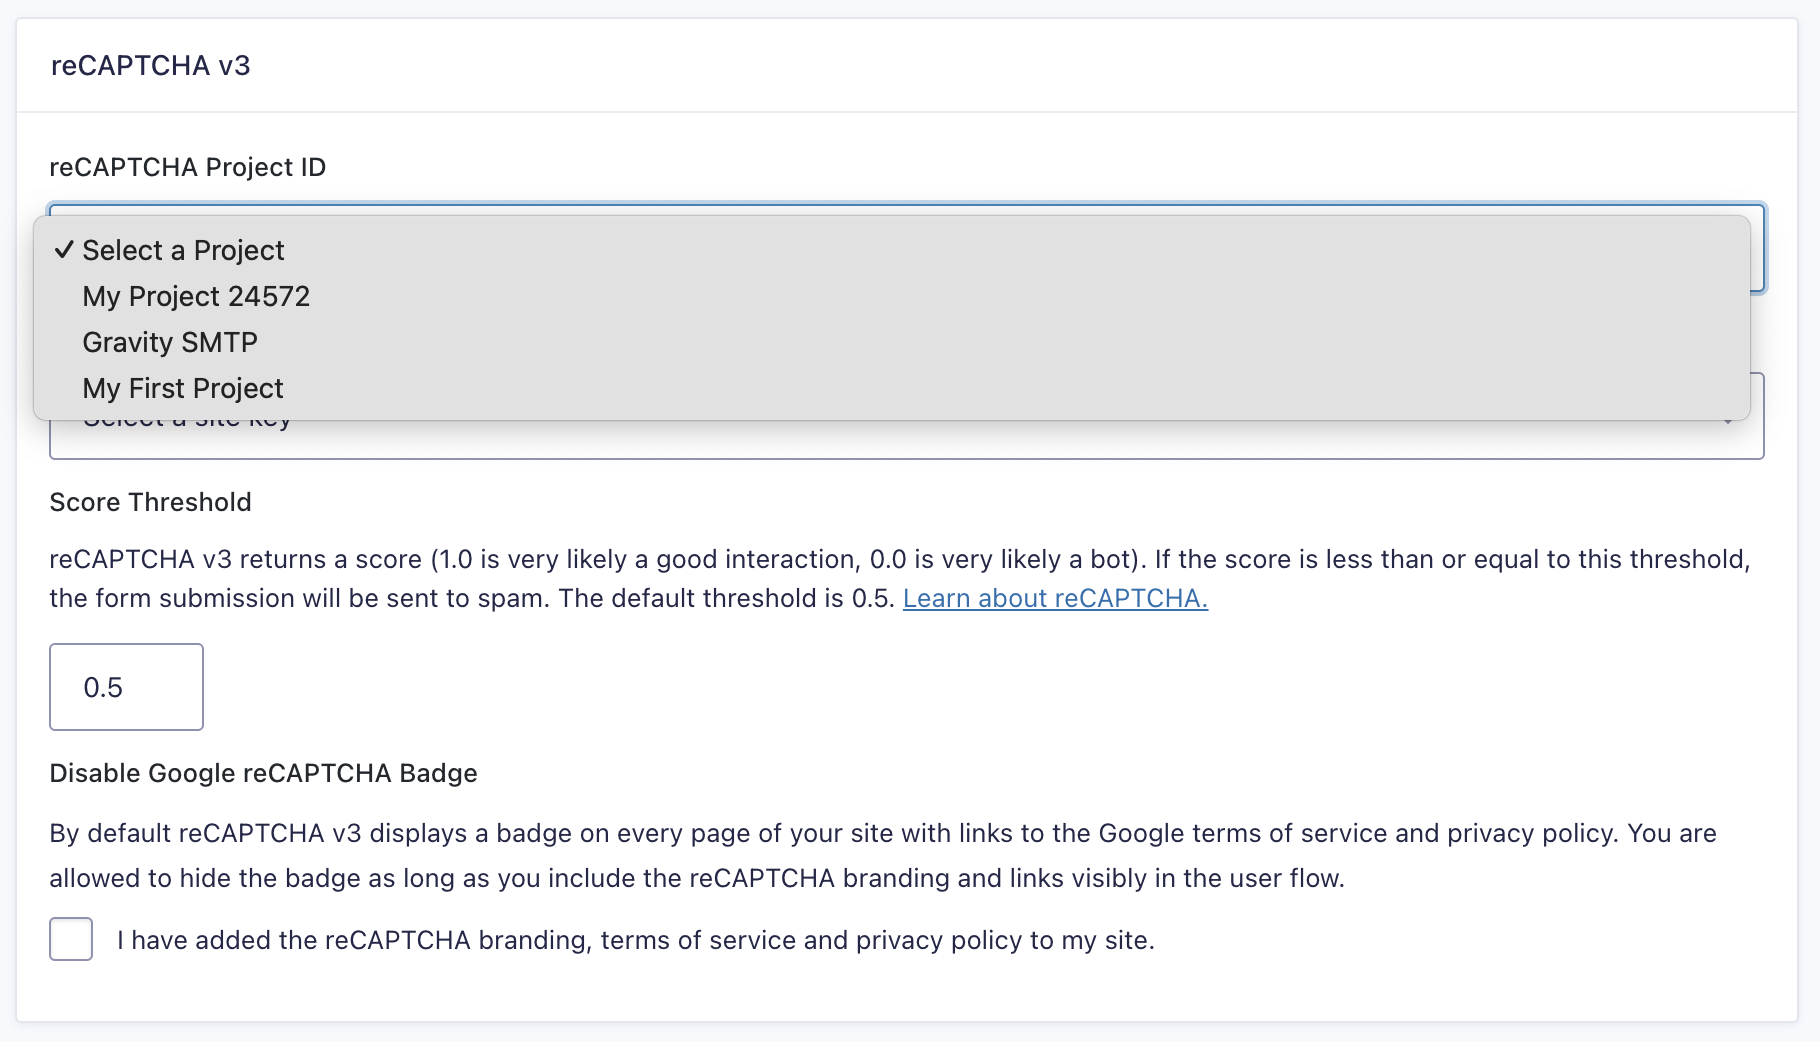
- Select a Google Cloud Project from the dropdown.
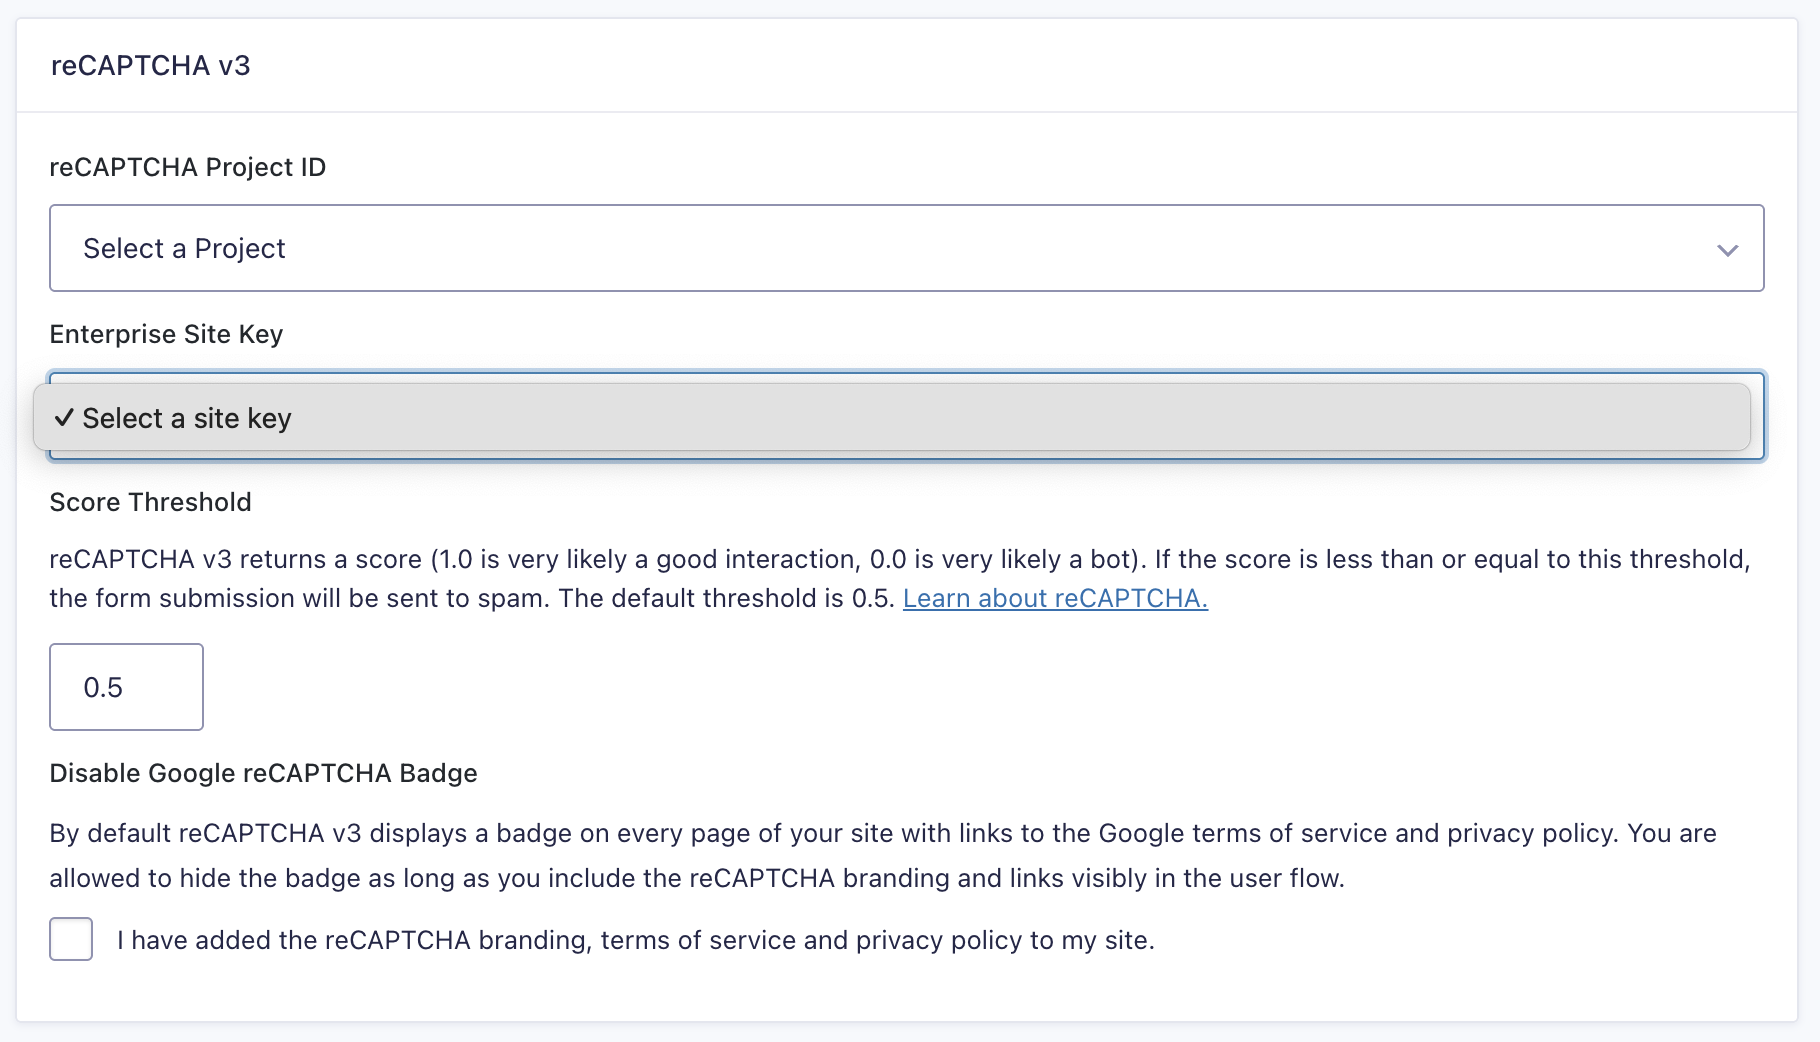
- Once the key dropdown appears, select the Enterprise key you created.
- Save the settings.
Setting up reCAPTCHA v2
Note: Using reCAPTCHA v2 does not require the reCAPTCHA Add-On. Gravity Forms core already includes native support for reCAPTCHA v2. The Add-On also supports it, providing a centralized configuration page for both v2 and v3 keys. For details, see the reCAPTCHA Settings.
To use reCAPTCHA v2, you need to register a v2 key pair for your website.
- Go to the Google reCAPTCHA Admin Console.
- Log in with your Google developer account, if required.
- Click the ”+” button to register a new site.
- Select reCAPTCHA v2 as the reCAPTCHA type.
Choose either “I’m not a robot” Checkbox or Invisible reCAPTCHA badge
These are not interchangeable. Be sure to generate the correct type of key. - Enter your domain name and complete the registration process.
- After registration, you’ll receive a Site Key and a Secret Key. Record both.
Adding Your reCAPTCHA v2 Keys in Gravity Forms
To connect Google reCAPTCHA v2 to Gravity Forms:
- In your WordPress dashboard, go to Forms → Settings → reCAPTCHA.
- Under the v2 settings section, paste in your Site Key and Secret Key.
- Choose the reCAPTCHA v2 type.
Checkbox or Invisible
This is a global setting and cannot be changed per form. - If you selected the Checkbox type.
– You may be prompted to manually click the “I’m not a robot” checkbox to validate the keys.
– Checkbox keys will not work with Invisible reCAPTCHA and vice versa.
Setting up reCAPTCHA v3 Classic
To use reCAPTCHA v3 (Classic), you need to register a set of keys for your website.
- Go to the Google reCAPTCHA Admin Console.
- Log in with your Google developer account, if required.
- Click the ”+” button to register a new site.
- Select reCAPTCHA v3 as the reCAPTCHA type.
- Enter your domain name and complete the registration process.
- Once created, you’ll receive a Site Key and a Secret Key. Record both.
Adding Your reCAPTCHA v3 Classic Keys in Gravity Forms
To connect Google reCAPTCHA v3 to Gravity Forms:
- In your WordPress dashboard, navigate to Forms → Settings → reCAPTCHA.
- Under the v3 settings section, paste in the Site Key and Secret Key you recorded.
- Gravity Forms will automatically validate the keys.
- If the keys are valid, you’ll see a ✅ green check mark next to each.
- There are no additional settings for v3; scoring is handled automatically during form submissions.
Setting a threshold
Note: This process is applicable only to reCAPTCHA v3 Enterprise and reCAPTCHA v3 Classic.
The threshold determines what Gravity Forms will do with form entries based on the reCAPTCHA v3 score they receive. Entries with a reCAPTCHA score less than or equal to this value will be classified as spam. For more information, refer to this Google article.
By default, the threshold is set to 0.5. If you wish to modify this, follow this procedure:
- Navigate to Forms → Settings → reCAPTCHA.
- Enter the threshold value you wish. The higher the score (from 0 to 1) returned from Google, the more likely it reflects a good interaction.
- This threshold value will affect new entries received from that point on.