Introduction
The Survey Add-On allows you to easily interact with your users to both collect and analyze data on your target audience. Market research, customer satisfaction, employee surveys, job satisfaction surveys – anything is possible! You can even implement Survey fields on an Order Form to quickly get feedback from your customers as they place an order!
The Survey field introduces not one, but three new field types geared towards surveys: Likert, Rating, and Rank. The Survey field is accessible in the Form Editor within the Advanced Fields toolbox.
The integrated Survey Results display allows you to view your survey results and filter the results data based on your needs. You can view Survey Results for any form that contains a Survey field by clicking on the Results link on the Gravity Forms toolbar.
Pre-Requisites
Configuring the Survey Field
After installing and activating the Survey Add-On, you can now add Survey fields to your form. This is done by adding a Survey field from the Advanced Fields toolbox in the form editor to any form you would like to add a Survey to. You would add a Survey field for each survey question you would like to ask the user.
- In your WordPress admin dashboard, go to New Form under the Forms navigation or edit an existing form from Forms.
- Add a Survey field to your form from the Advanced Fields toolbox.
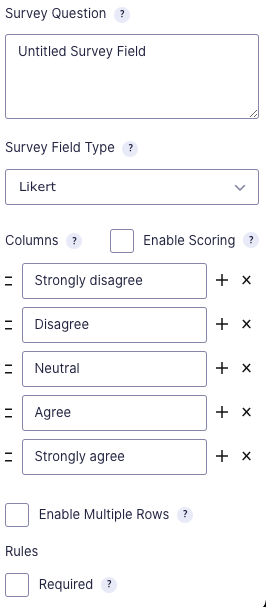
- Edit the field and configure the options. You can configure it as a Likert, Rank, Rating, Radio Buttons, Checkboxes, Single Line Text, Paragraph Text, or Drop Down field using the Survey Field Type option.
- Enter the survey question in the Survey Question box.
- Enter the answer choices in the Choices interface based on which Survey Field Type you selected.
- Save your form.
That’s it! Creating a Survey using Gravity Forms is that easy.
Display Your Survey
The Gravity Forms Survey Add-On uses the standard form shortcode, function, and widget in order to display the form. You would insert your survey into a page or post using the standard methods you already use when displaying a Gravity Form on your site.
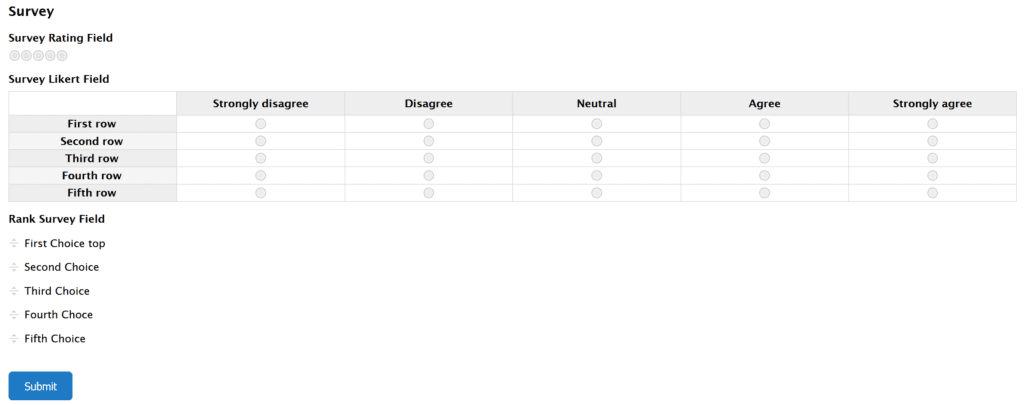
The following screenshot shows a simple form with a few Survey fields.
Survey Results
You can view aggregate results of your survey and filter this data based on date and field selection by going to the Survey Results. You access Survey Results by clicking on the Results navigation item in the Gravity Forms toolbar. If you have multiple Add-Ons installed that support Results, you will need to rollover the “Results” navigation item and then select “Survey Results”.
Survey Merge Tags
The Survey Add-On includes a few specific merge tags for use in notifications and confirmations.
- {score} — displays the score for a specific survey question.
- {survey_total_score} – displays the total score for the survey.