Summary
Before the Agile CRM Add-On can be used with Gravity Forms, you will first need to create a feed. A feed simply allows form submission data to be sent to another source. In this instance, contact and task data being sent to Agile CRM.
Create a Feed
To create a feed to Agile CRM using the Agile CRM Add-On for Gravity Forms, do the following from your WordPress Admin Dashboard:
- Click on Forms in the left side menu.
- Select the form that you want to use with Agile CRM.
- Once within your desired form, hover over Settings and click on Agile CRM.
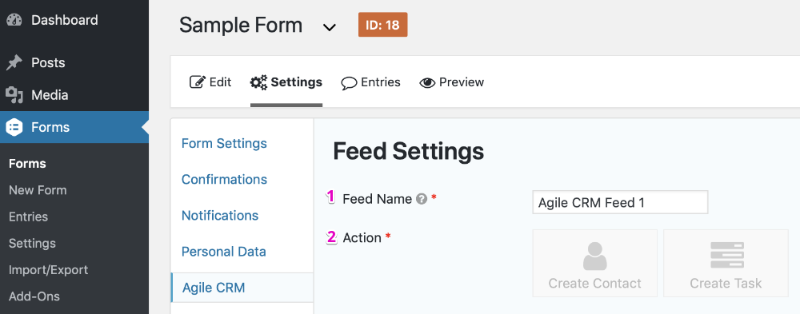
- Click Add New to create a new feed. You will be presented with the Agile CRM feed settings screen.
Feed Settings Screen
The following fields are available within the settings screen. Refer to the settings screenshots below.
- A Feed Name is required. It is only used for identification and will not be shown anywhere other than your feed listing.
- For Action, chose either Create Contact or Create Task. This will define the action that is performed when the feed is triggered by your form.
Creating a New Contact
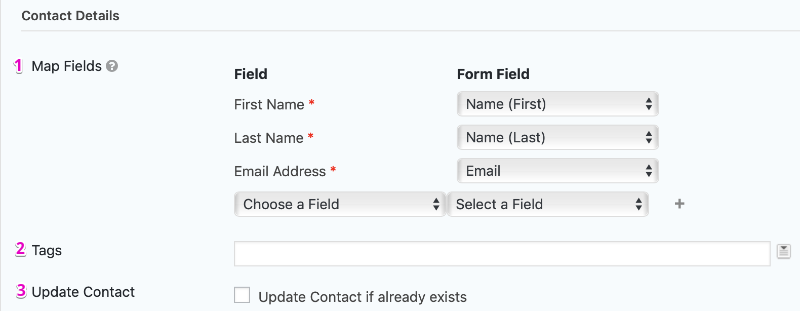
When Create Contact is chosen as the Action, the Contact Details will display.
- Map Fields: Fields accepted by Agile CRM are listed on the left, with form field dropdowns to the right. Use the dropdowns to select the fields within your form that will be used for the corresponding values. Additional fields may also be used when using the left side dropdown.
- Tags: Assign any tags that you would like to be associated with this contact. These values are comma separated and accept both static values as well as merge tags to dynamically insert tags based on field values.
- Select the checkbox labeled Update Contact if already exists if you would like to update the contact if it already exists in Agile CRM. If selected, an additional dropdown will appear allowing you to either replace existing information or simply append any new data. If this is not selected, an existing client will simply be discarded.
Creating a New Task
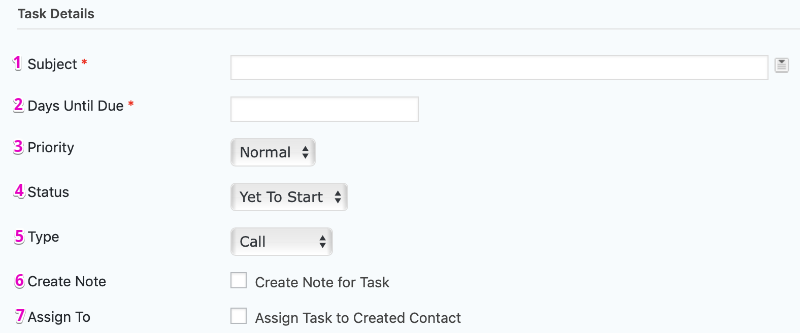
When Create Task is chosen as the Action, the Task Details will display.
- Define the Subject of the task. This field supports both static values, as well as merge tags to dynamically insert field values.
- The Days Until Due field allows you to determine the due date of new tasks submitted. This field requires a numerical value and will set a due date this many days in the future.
- Priority: Use the dropdown to set the Priority. Options are High, Normal, and Low.
- Status: Use the dropdown to set the Status. Options are Yet To Start, In Progress, and Completed.
- Type: Use the dropdown to set the Type. Options are Call, Email, Follow Up, Meeting, Milestone, Send, Tweet, and Other.
- Select the checkbox labeled Create Note for Task to create a new note on that task. Additional fields will appear allowing you to set the Note Subject and Note Description. These fields support both static text, as well as merge tags to dynamically generate content based on field submissions.
- If the Assign Task to Created Contact checkbox is selected, a contact will be created upon submission and the new task will be assigned to the newly created contact.
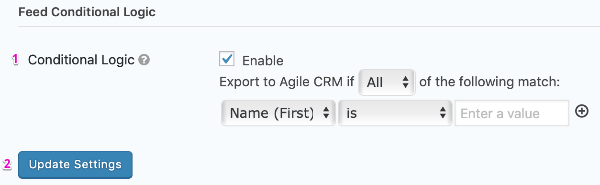
Conditional Logic
- Conditional Logic: If unchecked, every successful form submission will be sent to Agile CRM. If you wish to set specific conditions for sending form data to Agile CRM, then check the “Enable” box and fill out your required criteria.
- Click the Update Settings button to save your options.