Summary
Before the HubSpot Add-On can be used with Gravity Forms, you will first need to create a feed. A feed simply allows form submission data to be sent to another source. In this instance, sending contact information to your HubSpot account.
Create a Feed
To create a feed to HubSpot using the HubSpot Add-On for Gravity Forms, do the following from your WordPress Admin Dashboard:
- Click on Forms in the left side menu.
- Select the form that you want to use with HubSpot.
- Once within your desired form, hover over Settings and click on HubSpot.
- Click Add New to create a new feed. All the options you are presented with are described in the next section.
Feed Settings Reference


Settings Reference
| Setting | Description |
|---|---|
| Name | To identify your feed when viewing the feed list page. Required |
| HubSpot Form Name | Name of the form that will be automatically created in your HubSpot account to work with this feed. Once created, that form should not be edited or removed. Required. |
| Lead Status | Status of the newly created contact in HubSpot. Select a blank row to not assign any status. |
| Lifecycle Stage | The lifecycle stage of the newly created contact in HubSpot. Defaults to Lead. |
| Contact Owner | Choose form options: None – contact will be unassigned when created. Select Owner – automatically assigns the contact to a specific HubSpot user. Assign Conditionally – set specific conditions for assigning the owner. |
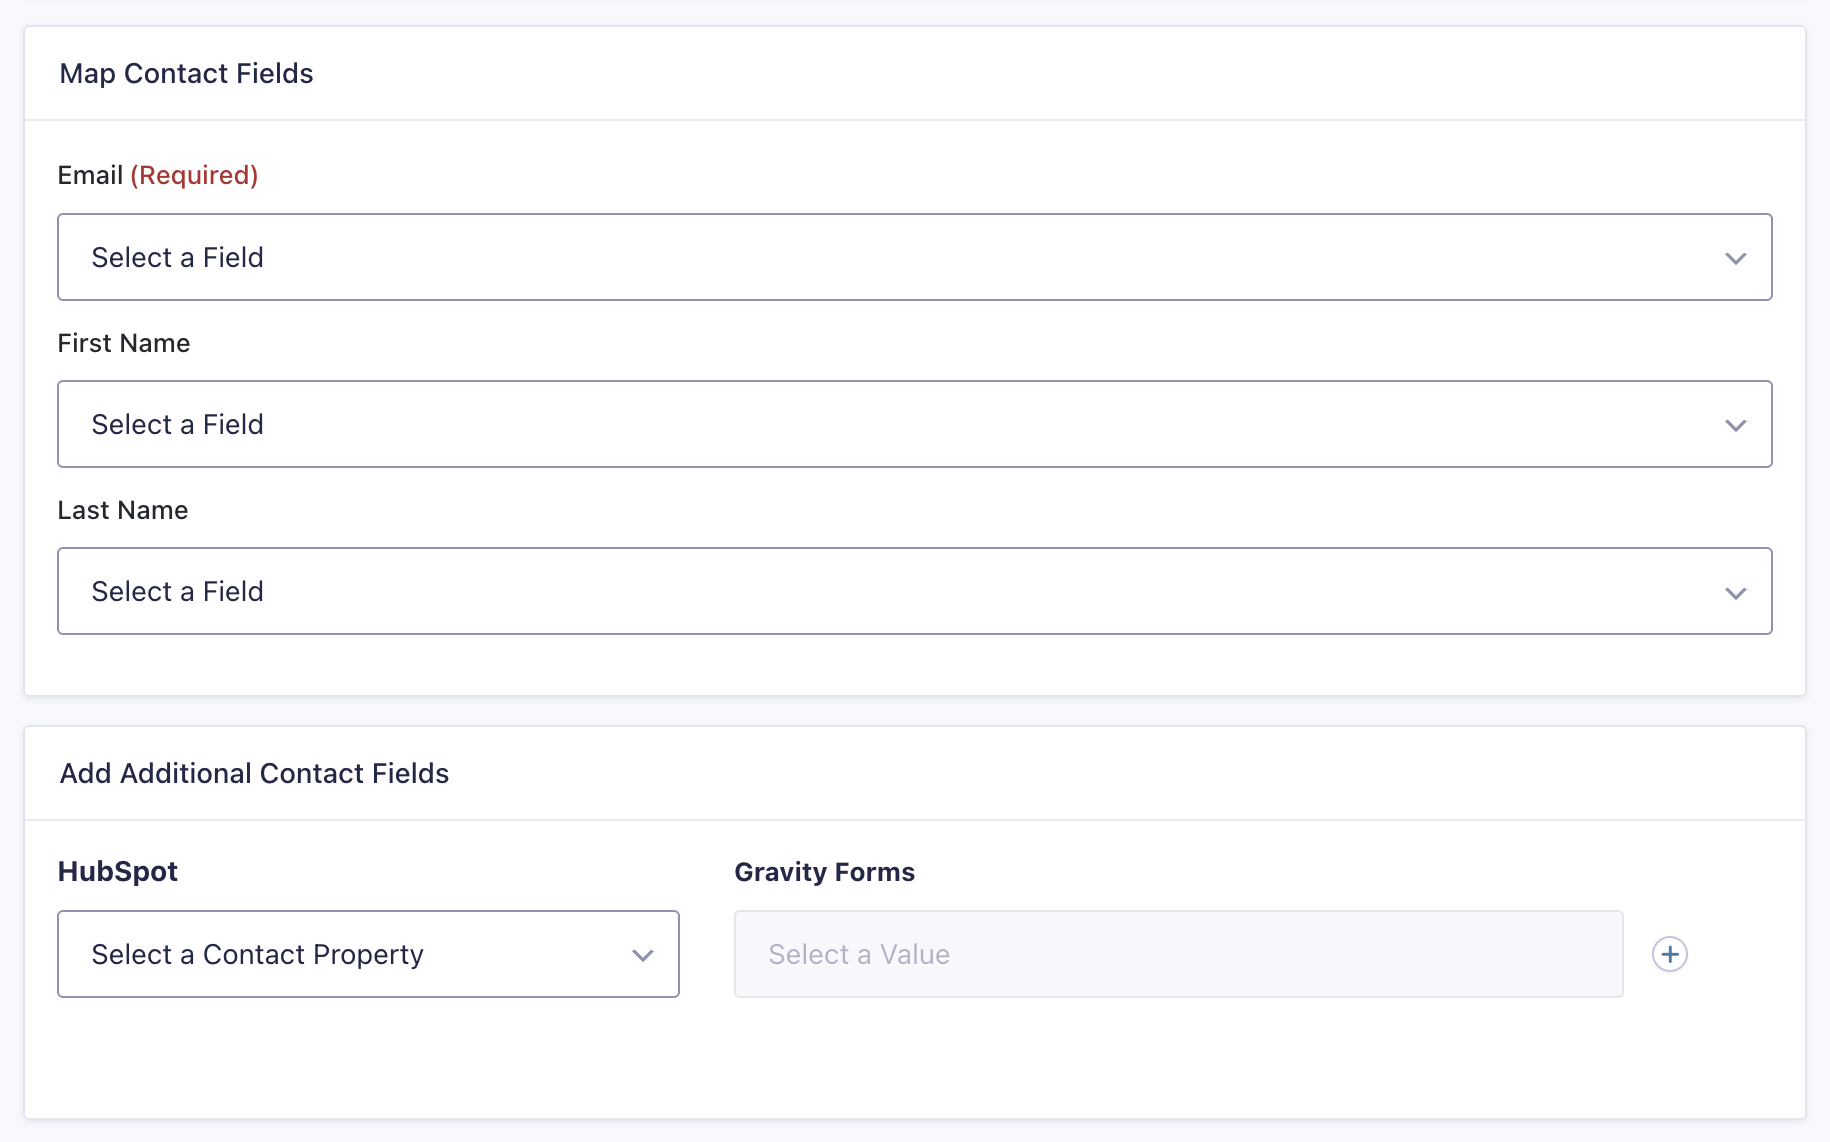
| Map Contact Fields | Map HubSpot contact fields to the form field that will send that information. Email field is required. |
| Add Additional Contact Fields | Map the additional HubSpot Contact Information properties to the form field you wish it to be filled by. See Field Mapping section below. |
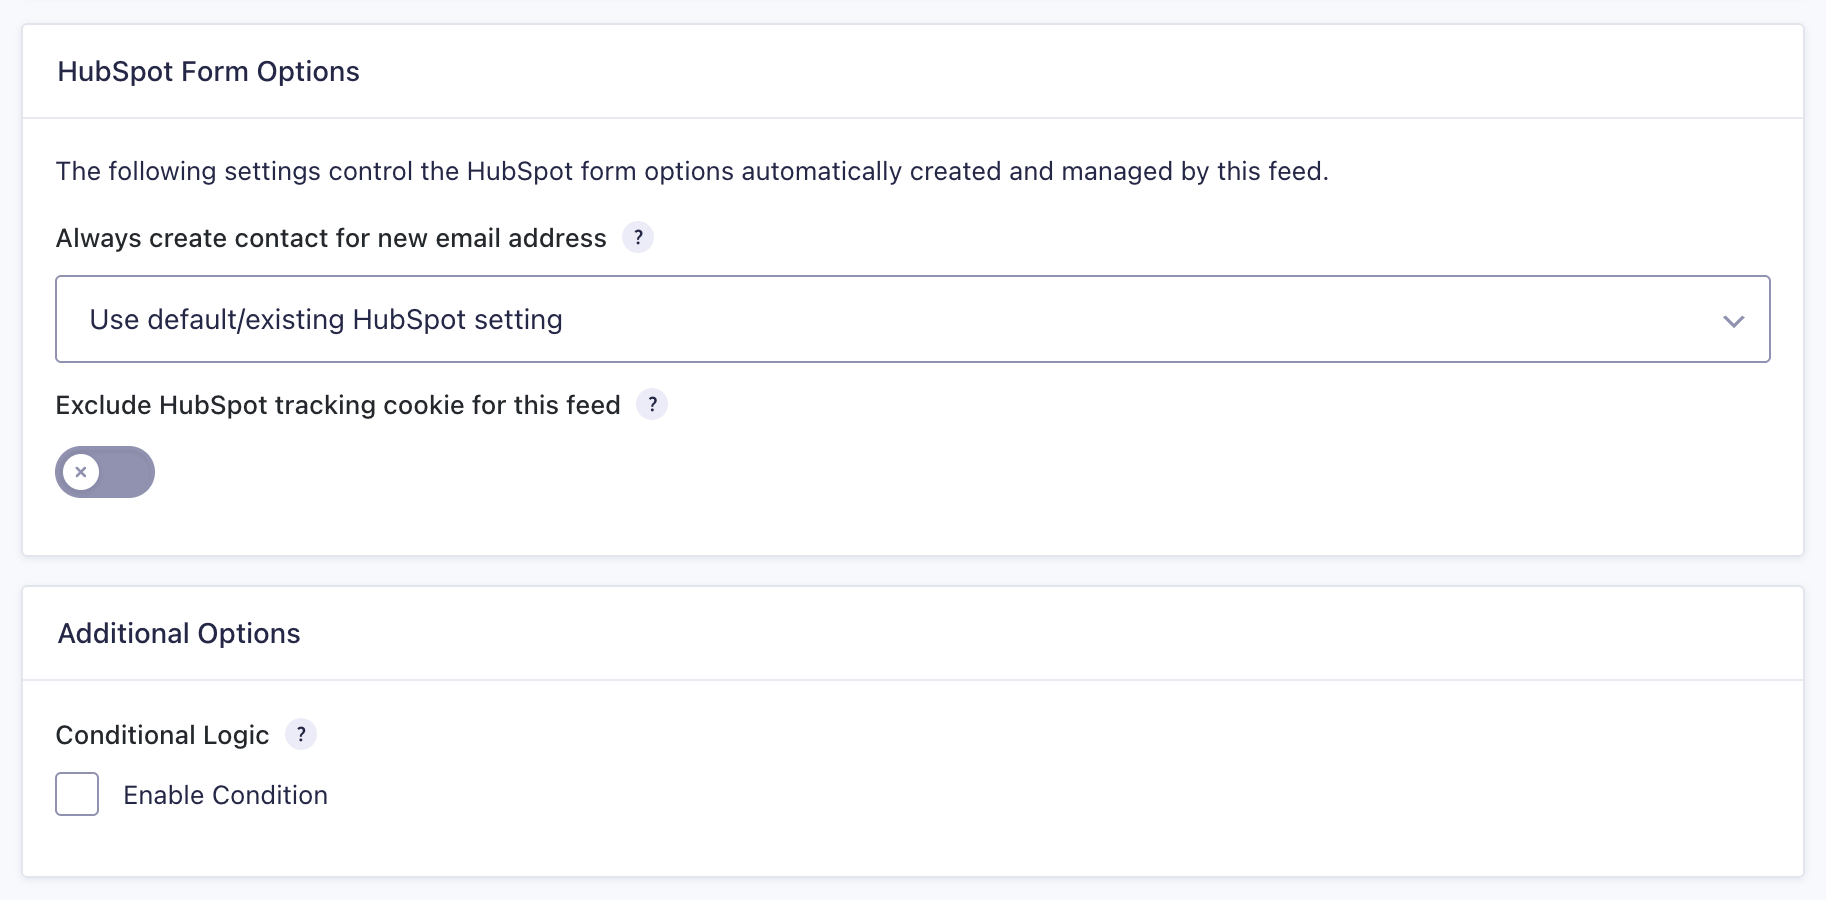
| Always create contact for new email address | Controls how HubSpot handles contact creation when a form is submitted. Choose form options: – Use default/existing HubSpot setting – Enable. Creates a new contact record for every unique email address. – Disable. HubSpot may associate submissions with existing contacts using browser cookies, potentially overwriting or merging contact records. |
| Exclude HubSpot tracking cookie for this feed | When enabled, it prevents the HubSpot tracking cookie from being included in the form submission for this feed, preventing HubSpot from linking the submission to the visitor’s browsing session and ensuring a new contact is created rather than associating it with an existing one via cookie tracking. |
| Enable Conditional Logic | If unchecked, every successful form submission will be sent to HubSpot. If you wish to set specific conditions for sending form data to HubSpot, then check this and fill out your required criteria. |
Note: The Contact Owner section might be hidden for the connected HubSpot account if the add-on finds that it can’t create or update a HubSpot form when the owner field is included. Starting in early December 2025, HubSpot is limiting which accounts can use the owner field with forms. Contact properties must have the ‘Show property in forms and bots’ option enabled in the Rules settings field of the HubSpot account to be offered for mapping.
Custom Property Caching
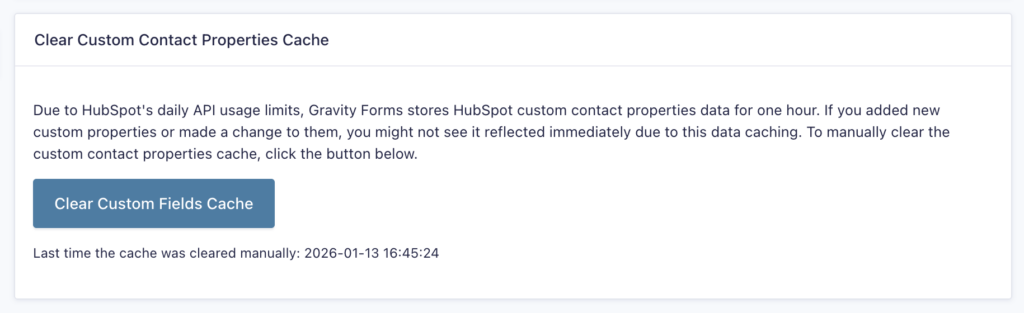
The list of custom fields retrieved from HubSpot is cached for approximately one hour to stay within the HubSpot API limits. This can mean that newly created HubSpot custom properties may not be immediately visible within the configuration menus.
To force update this cache, go to Forms → Settings → Hubspot and click the “Clear Custom Field Cache” button.
Field Mapping
Custom fields can be created within your HubSpot account by using the Create a Property option under the Actions → Property Settings area.
Mapping to Gravity Forms fields
Radio Buttons
Enable the option Show Values in your form Field Settings, and set the “off” choice value to “false” (you can also leave it empty, as long as the field is not required).
Drop Down
Use the Placeholder appearance field setting for the “off” option, or enable Show Values and set the “off” option to “false”.
Consent
Consent Field is supported.
Advanced choice-based fields
Such as Quiz, Poll, and Survey, are not supported.
Note: When configuring HubSpot fields that support a list of choices, all values for that property must exactly match the value configured for that Gravity Forms choice-based field.
User Submissions
The first user form submission creates the customer record in HubSpot. The customer information will be updated if the user submits the form again using the same email address. A new customer record will be created when a new email address is submitted.
Each browser session is stored in a cookie, and each form submission updates the same customer. To create a new customer record in HubSpot, the user must launch a new browser session. This is important to note when creating multiple customers back-to-back, whether for testing or additional purposes.