Introduction
In this article, we will show you how to export all of your form entries (submissions) to enable further analysis or manipulation in external tools.
How To Export Entries
- First, log into your WordPress admin dashboard.
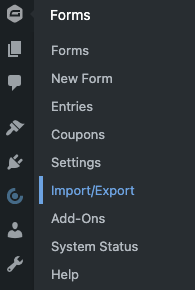
- From within inside your WordPress admin, hover over Forms and click on Import/Export.

- You should be immediately prompted with the Export Entries tab. Within here, select the form that you want to export the entries for in the dropdown.
- Once the form to export entries from is selected, additional options will be shown. The first of these settings is the Select Fields option. This will allow you to specifically select the form fields you want to export. Simply select the checkboxes next to each form field that you want to export.

- The next available option is Conditional Logic. Here, you are able to export only fields that contain specific information.
- Lastly, you may also select a date range for the field submissions that are exported. If you leave this blank, all entries will be exported.
- Once all options are appropriately selected according to your needs, click the Download Export File button. Depending on the amount of information you have within your export it may take some time to download the .csv file.

You have now exported your form entries. From here, what you do with this information is all up to you. This feature is great for backing up your data, as well as generating an offline copy of submissions for further investigation.
Note: entries flagged as Spam won’t be included in the exported file.

How To Modify Exported Dates
Modifying the exported data is an advanced feature intended for developers and is not required if you simply want to export entries. The available filters to modify exported data are:
- gform_export_field_value: Use this filter to override the field value before it is included in the CSV export.
- gform_export_fields: Use this filter to add/remove fields in conjunction with the filter gform_export_field_value.
- gform_leads_before_export: Allows entries to be changed before export is executed.