Pre-Requisites
- Download and install the add-on
- A Chained Selects field on your form
Summary
When creating Chained Selects in Gravity Forms, you will need to create a CSV file that will hold all of your available options. In this article, we will show you how to easily create a chained select field using the Chained Selects Add-On.
Creating Choices
First you will need to create the choices that will be available within the field. This is done by creating a CSV file.
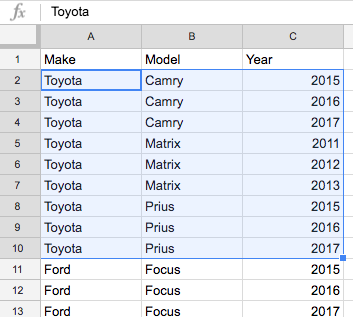
In this example, we will be using Google Drive to create a CSV file, but other software such as Microsoft Excel can also be used.
Setup
Chained Selects requires a few different things within your CSV file to work properly:
- Selects laid out in columns.
- Column headers as select labels.
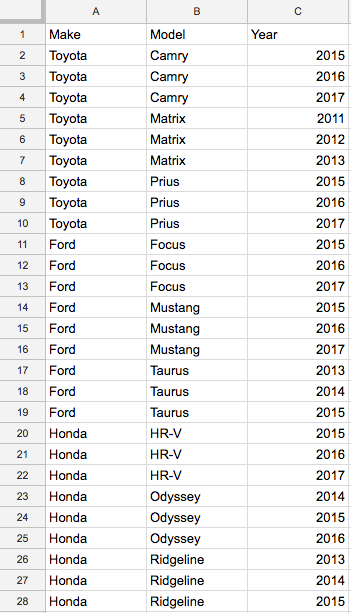
It should look something like this:
Headers
The first row contains the column header. This is essential, as it lays the foundation for each select.
Selects
Following the first row, each combination of options is laid out with subsequent options continuing to the right.
In the following example, the user would be selecting a car’s make, model, and year. Because of this, each option and subsequent child options need to be defined.
As seen above, if a user selected a Toyota, additional options of Camry, Matrix, and Prius would be available. Once the model is selected, the year would then be available.
Generating Choice Files
After you’ve set up your choices, you’ll need to generate a CSV to import into the Chained Selects field. We will use Google Drive as an example here, but you’re free to use anything you want, as long as the file is exported as a CSV.
Important: Be sure the generated CSV does not have any extra spaces in the choice values. Extra spaces will cause unpredictable results when outputting the chained select dropdowns.
Exporting From Google Drive/Google Sheets
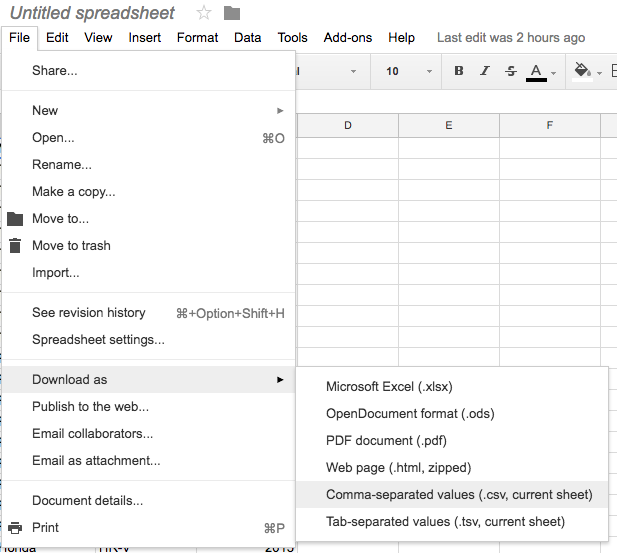
To export your settings as a CSV, click on File at the top of the page, select Download as, then select Comma-separated values. The file will then be downloaded and ready to import into your Chained Select field.
Uploading Chained Select Choices
To upload your created CSV file, access your Chained Selects field and upload the file to the Import Choices field setting. Be sure to update your form when completed to retain your uploaded field choices.
Limitations
By default the CSV file being uploaded is limited to 5000 unique values allowed for each column and 1mb of file size. If you require going beyond these limits, you can alter them using gform_chainedselects_column_unique_values_limit and gform_chainedselects_max_file_size respectively.