Pre-Requisites
- Gravity Forms and Gravity Forms Mollie Add-On installed
- SSL Certificate Installed and Configured
- A Mollie Account
Getting to the Mollie Settings
The Mollie Settings will allow you to connect and authenticate to your Mollie account. It will allow you to connect to either your Live or Test Mollie environment.
Navigate to your Mollie Add-On Settings page:
- Log into your WordPress admin dashboard.
- On the left side navigation menu, hover over Forms and click on Settings.
- Click on the Mollie tab.
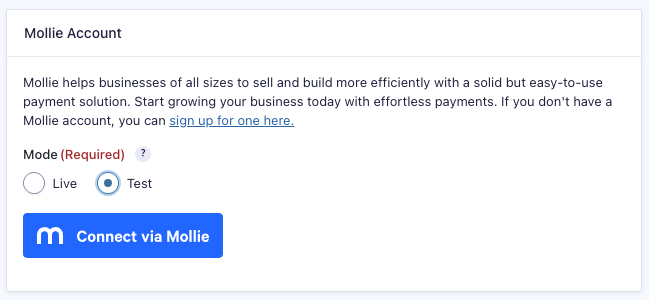
Mode
Specify the environment you want to send your form submissions to. Choosing Live will send transactions to your live/production Mollie account and may initiate real charges. Test will pass the form entry into your Mollie Test environment, which will not generate any real transactions.
- Under Mollie Account, select the Mode to use for Mollie integration: Live or Test.
- Continue in the sections below labeled Connecting to Live or Connecting to Test.
Connecting to Live
- Select the Mode Live and Click the Connect with Mollie button.
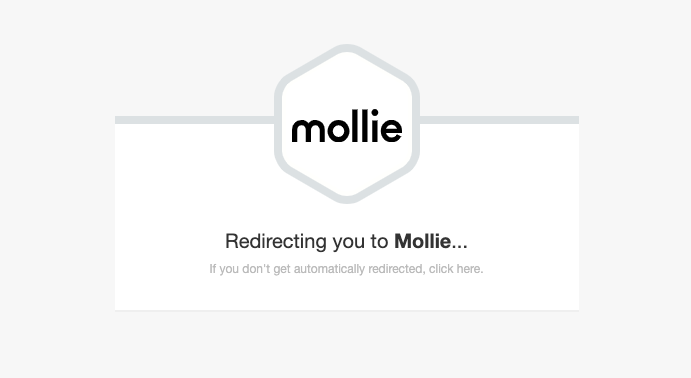
- Your web browser will pass you to a new screen showing “Redirecting you to Mollie…”
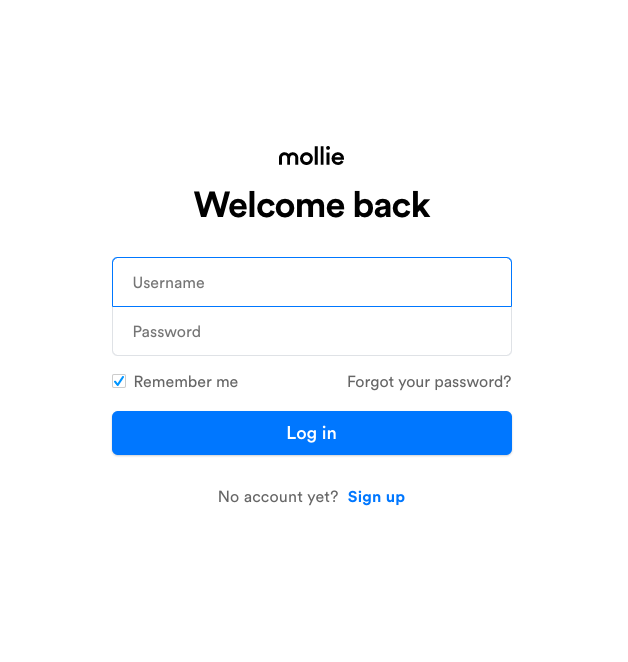
- Login with your Mollie Account and Sign In.
-
You will be directed to a Mollie Permissions screen with the message “Gravity Forms requests access to your Mollie Organization:” and a list of the permissions that are necessary for the feed to be properly configured. If you have multiple organizations under this account, you can select the correct organization from the drop-down list provided.
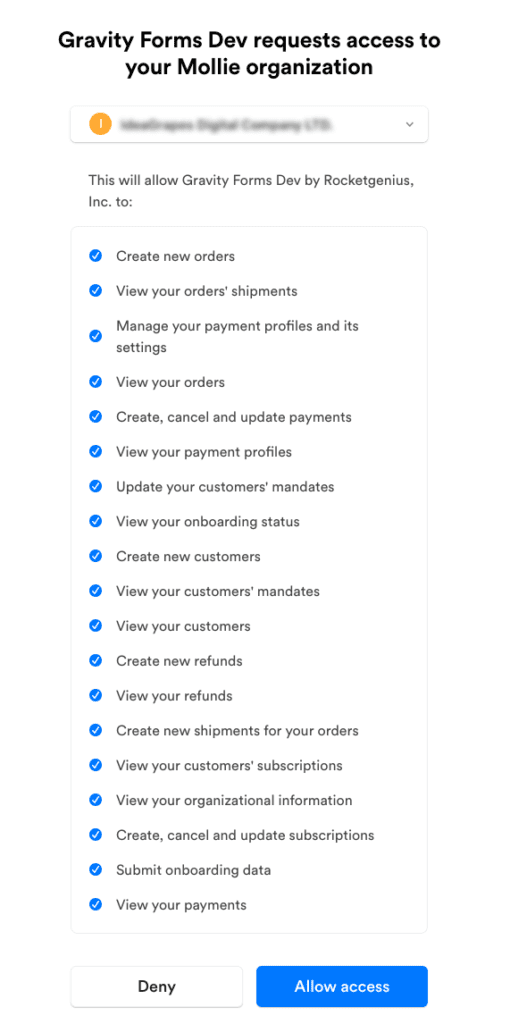
- Click Allow Access to accept the listed permissions for Gravity Forms access to your Mollie account. This will connect your Mollie account to Gravity Forms.
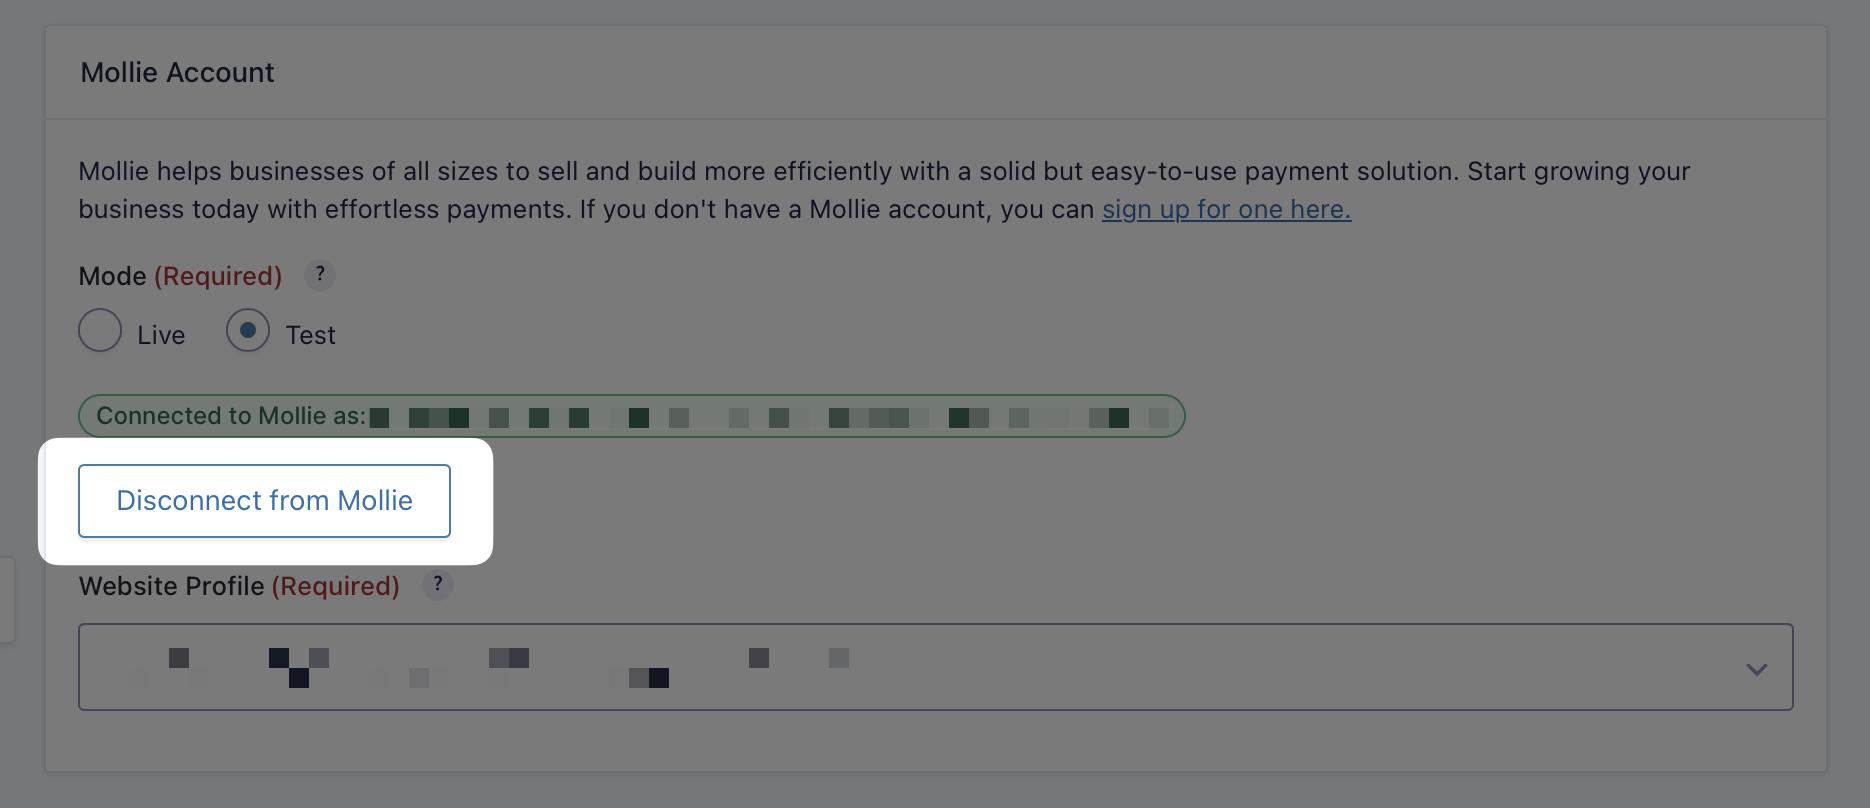
- You will be returned to the Mollie Settings tab. You should see “Connected to Mollie as” with your Organization name.
- A new section will also be added for Website Profile and a drop-down allowing you to select your Profile from your Mollie Account. Your default Business Location in Mollie will be selected, but if you have more than one in your account, you can select the correct one from this list.
- Click Update Settings to finish configuring your Mollie Settings.
Once you have entered your Mollie settings, you’re ready to begin Setting up a Mollie Compatible Form.
Connecting to Test
You can switch back and forth between Live and Test at the Mollie Settings screen once you’ve made the initial connection to your account.
- To Switch to Test, select Test under Mode and Click Update Settings.
- To Switch to Live, select Live under Mode and Click Update Settings.
Once you have entered your Mollie settings, you’re ready to begin Setting up a Mollie Compatible Form.
Disconnecting your Mollie Account
To disconnect your connected Mollie Account, click the Disconnect from Mollie button in Forms → Settings → Mollie, then save your changes.
Notes
When connecting and testing transactions in Test Mode, the customer data is always shown as “Test Consumer/[email protected]” in the Mollie Dashboard, under Payment Details, regardless of the billing information mapped.
Locale Compatibility with Mollie
If you’re encountering issues with localization when using Mollie, check your site’s locale settings since Mollie supports a limited set of locale codes when processing payment requests. If your WordPress site is using a locale not supported by Mollie, it may cause issues with localized payment screens or customer facing elements.