Pre-Requisites
- Refer to the article Setup the Mollie Add-on
Introduction
The next step in integrating the Mollie Add-on is to create the form you are going to use. This can include existing forms. To be compatible with the Mollie Add-on, your Gravity Form must contain at least the following fields:
- A Pricing field
- A Mollie field, which provides Payment Method selection and Credit Card Inputs.
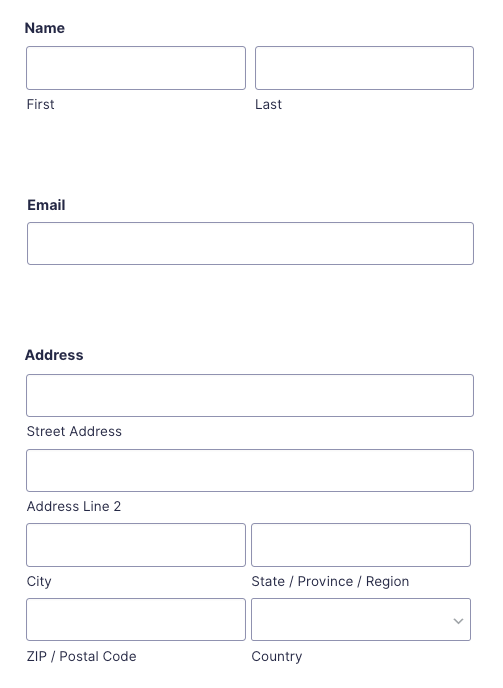
- A Name field
- An Email field
- An Address field
Available Payment Methods
With the Mollie Add-on, you can configure Product or One-time Donation payments. The Mollie Add-on does not currently support recurring payments or subscriptions. If you require such functionality, you can specify your need via our Product Roadmap.
Create Your Form
- From the left-hand navigation menu of your WordPress admin dashboard, hover over Forms and click on New Form.
- Enter a Form Title and Form Description. Click Create Form. Alternatively you can hover over Forms and click on Forms to choose an existing form from the list.
- Add fields for capturing standard Customer payment information. We included the Name, Address and Email fields to get basic information from customers. Note: These are required fields for the Feed to Mollie.
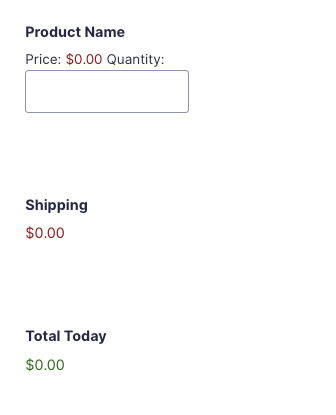
- Add the required fields to your form and configure them as needed. These include Pricing fields of your choice. In the example below, the Shirt, Shipping, and Total serve as the Pricing fields.
- Add the Mollie Field – Expand the Pricing Fields section and add the Mollie field to your form to collect payment information via the Mollie field, which provides Credit Card and Cardholder Name input along with Payment Method selection. See the Mollie Field documentation for a full-breakdown of configuring this field. If you have another Payment Gateway add-on installed and active, the Gravity Forms Credit Card Field is still available in case you are allowing users to choose from a list of payment processors, such as Stripe and Authorize.Net (the standard Credit Card field is needed for Authorize.Net’s processing). Conditional logic can be used to show/hide the Credit Card field depending on the payment processor selection.
If your form does not look exactly like the image above, don’t panic. Every form will vary depending on which fields were selected and what order they were added to the form. As long as you have pricing fields of some sort and the Mollie field, your form is valid for integration.
Summary
Now that you have created your form for Mollie, visit Creating a Feed for the Mollie Add-On for the next step in the integration process. This is a critical step. If it is not completed, nothing is sent to Mollie for processing.
If you need help with creating forms, visit Creating a Form for more information.
Notes
- When using Page fields to create a multi-page form, the Mollie field should be located on the last page of the form.
- If you delete the Mollie field from your form, the Mollie feeds will automatically deactivate to prevent them from running during form submission, which as the field is missing, would cause a validation error due to Mollie being unable to capture the card details.
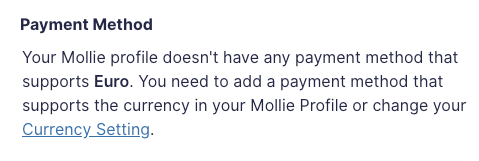
- Your Gravity Forms Currency Settings must match the Currency Settings in your Mollie account or you will get an error message upon adding the Mollie field that your Mollie account doesn’t have any payment methods that match the currency settings on your form.