Pre-Requisites
Setup
- Log into your WordPress admin dashboard.
- On the left side navigation menu, hover over Forms and click on Settings.
- From this page, click the 2Checkout tab. You will be presented with the 2Checkout Settings Screen
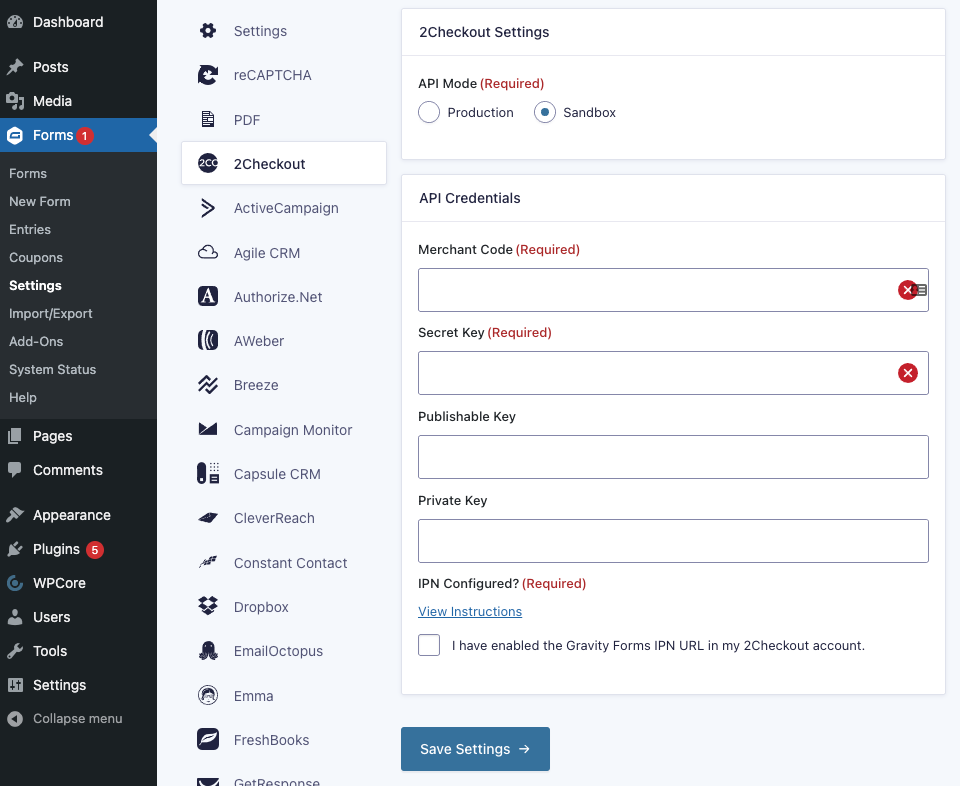
API Mode
This option allows you to switch between Production and Sandbox environments within your 2Checkout Account. Sandbox Environment is configured in your 2Checkout Account by enabling the Test Order System option within your 2Checkout account under Dashboard > Setup > Ordering Options.
We highly recommend enabling Sandbox for testing your configuration prior to processing actual transactions.
API Credentials
You will complete this section using the details found within your 2Checkout account. Look under your 2Checkout Account Dashboard > Integrations > Webhooks & API.
- Merchant Code: Enter the Merchant Code from your 2Checkout Account. This field is required.
- Secret Key: Enter the Secret Key from your 2Checkout Account. This field is required.
- Publishable Key & Private Key: These are no longer required to be populated, but if you have them in your account for this API key, it doesn’t hurt to add them.
- IPN Configured? See the section below on IPN Configuration. This field is required and should be checked after you have confirmed that you have enabled the IPN URL in your 2Checkout Account.
- Click Update Settings to save your changes.
IPN Configuration
You will be required to complete the IPN Configuration in order to use 2Checkout for Transactions. This requires your website to be loaded in a live setting as the IPN URL connects to your 2Checkout Account and your website must be live for 2Checkout to make the connection. When you click the View Instructions link under IPN Configured? you will be presented with this screen (URL’s may differ for your installation):
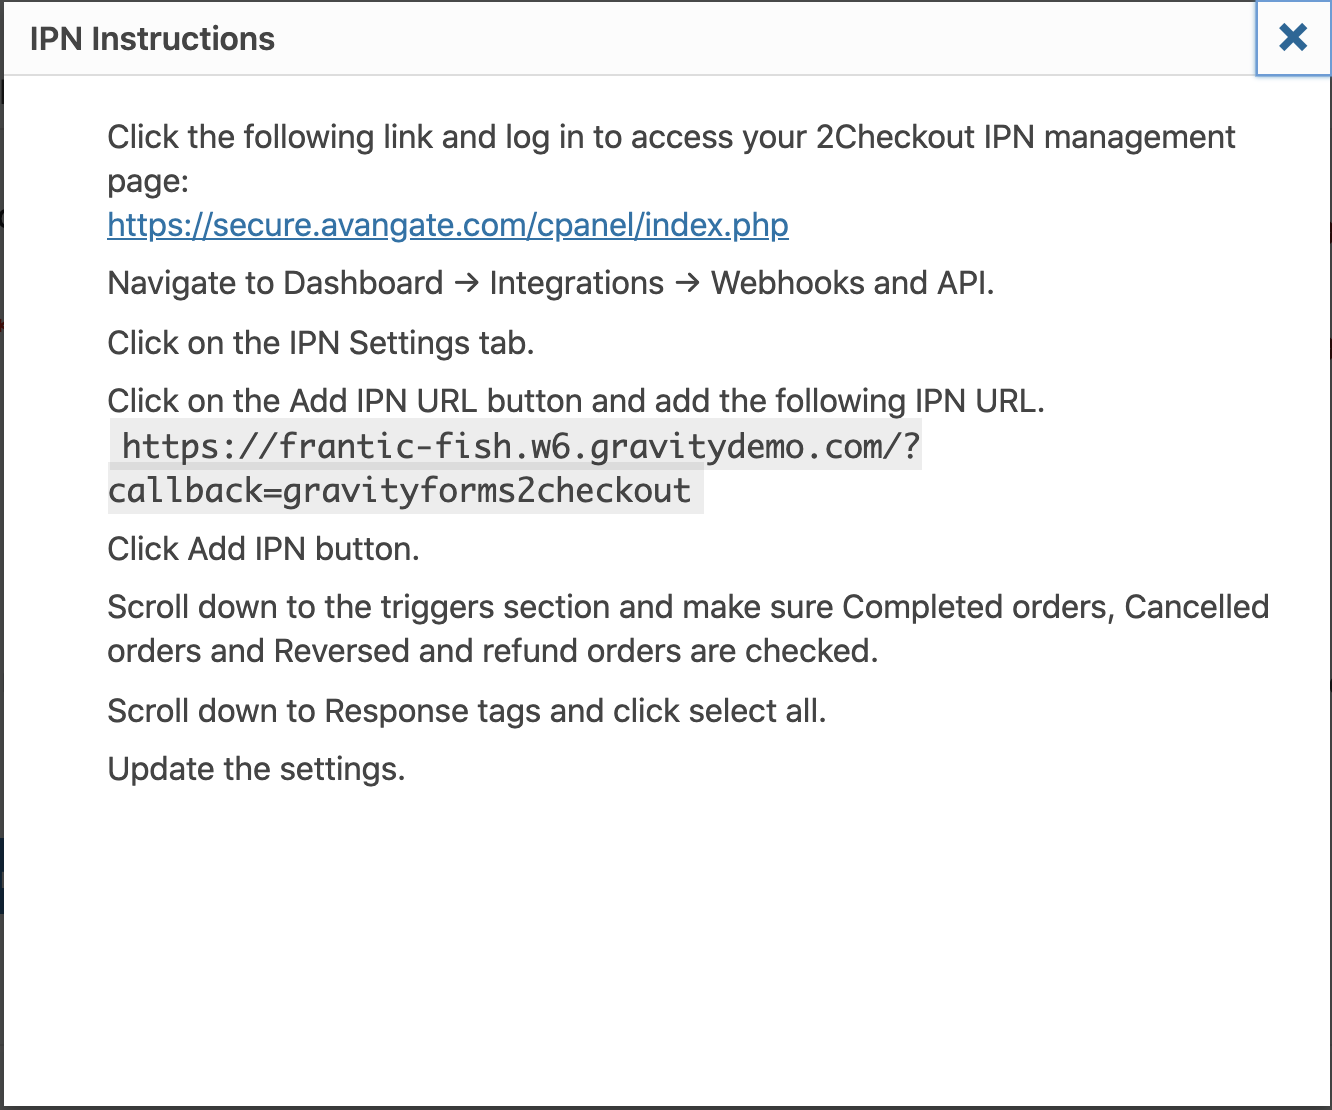
IPN Instructions
1. Click the link provided to login and access your 2Checkout IPN management page.
2. Navigate to Dashboard > Integrations > Webhooks and API
3. Click on the IPN Settings tab.
4. Click on the Add IPN URL button and add the IPN URL provided in the pop-up window.
5. Click Add IPN Button
6. Scroll down to the triggers section and make sure Completed orders, Cancelled orders and Reversed and Refund orders are checked.
7. Scroll down to Response Tags and click select all.
8. Update the Settings.
9. You will be returned to the 2Checkout Settings screen. You can now check the IPN Configured? checkbox verifying that you have enabled the Gravity Forms IPN URL in your 2Checkout Account. This is a Required Field.
Switching Modes from Production to Sandbox
When testing transactions, you can switch the API Mode by switching from Production to Sandbox and clicking Update Settings.
Once you have entered your API keys, you’re ready to begin creating a feed for the 2Checkout add-on.