Summary
Before the Zoho CRM Add-On can be used with Gravity Forms, you will first need to create a feed. A feed simply allows form submission data to be sent to another source. In this instance, contact and lead data being sent to Zoho CRM.
Create a Feed
To create a feed to Zoho CRM using the Zoho CRM add-on for Gravity Forms, do the following from your WordPress Admin Dashboard:
- Click on Forms in the left side menu.
- Select the form that you want to use with Zoho CRM.
- Once within your desired form, hover over Settings and click on Zoho CRM.
- Click Add New to create a new feed. You will be presented with the Zoho CRM feed settings screen.
Feed Settings Screen
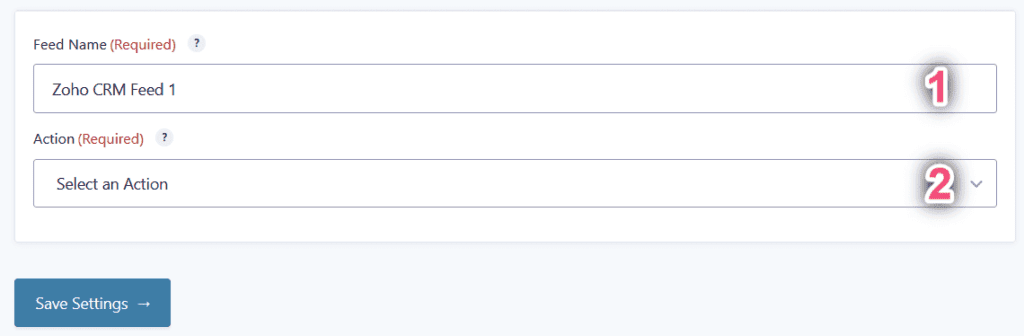
The following fields are available within the settings screen. Refer to the settings screenshots below.
- A Feed Name is required. It is only used for identification and will not be shown anywhere other than your feed listing.
- For Action, chose either Create a New Contact or Create a New Lead. This will define the action that is performed when the feed is triggered by your form. You can use your feed to either create a new contact or a new lead.
Creating a New Contact
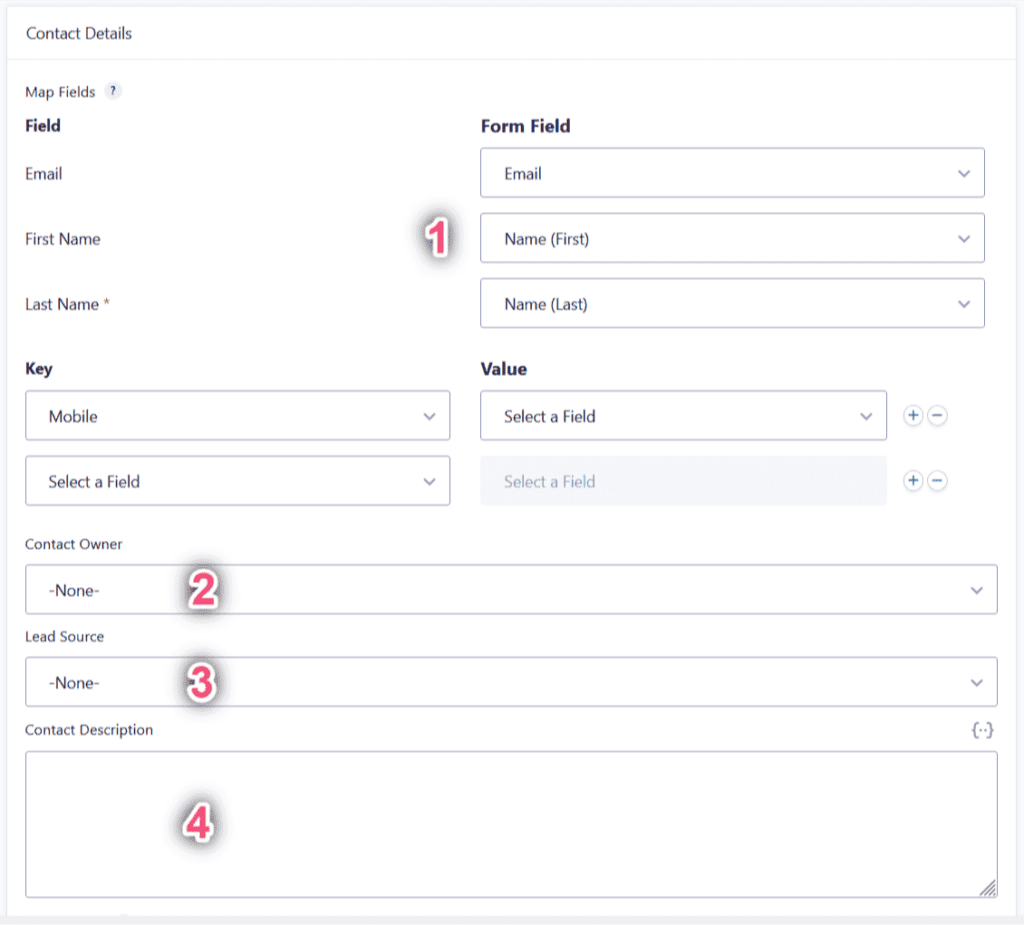
When Create a New Contact is chosen as the Action, the Contact Details will display.
- Map Fields: Select each of your fields that apply to the defined value. You can define other values by using the bottom-left dropdown in this section. If you need to add a custom field, select “Add Custom Key” in the dropdown and use the Zoho CRM field API name as key. You can check the API names for your fields in your Zoho CRM account Setup -> APIs screen, selecting API names.
- Contact Owner: Select the person to be the owner of the new contact.
- Lead Source: Select the source of the lead to be associated with the new contact.
- Contact Description: Set a description of the submitted contact. This field supports both static text, as well as merge tags to dynamically insert data based on the form submission.
Creating a New Lead
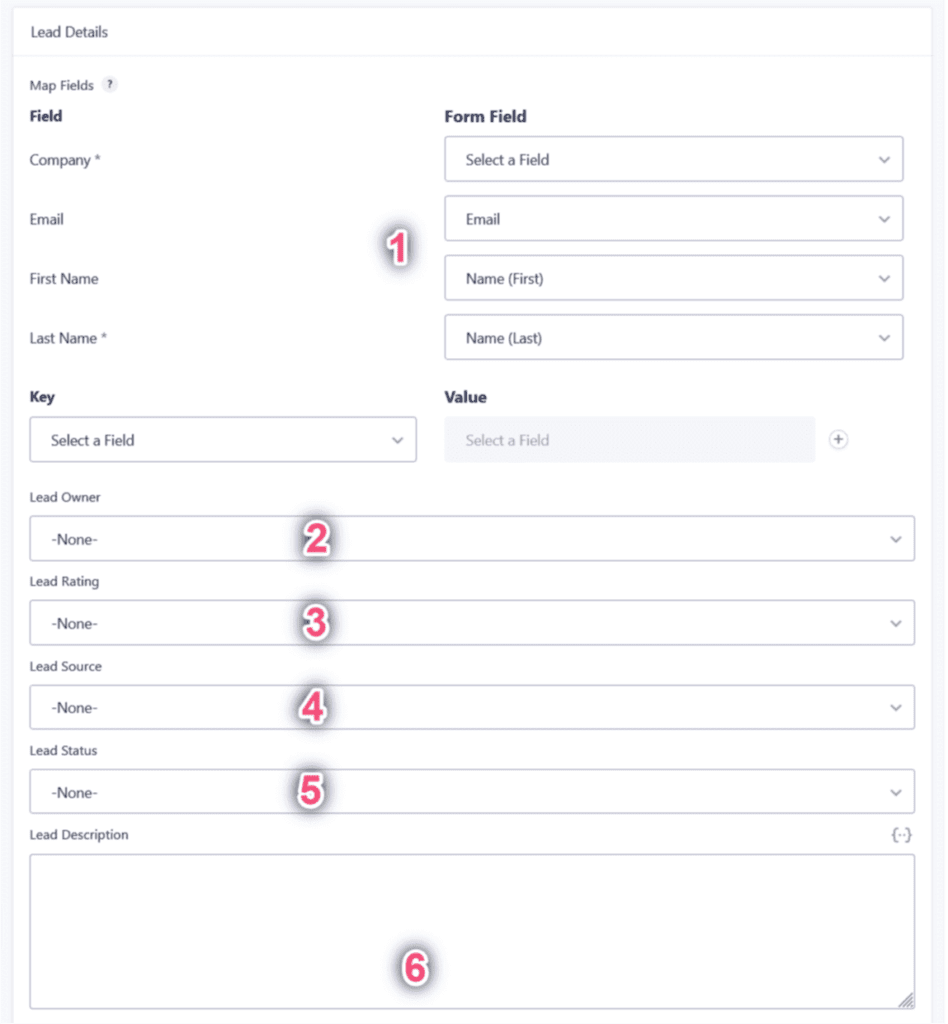
When Create a New Lead is chosen as the Action, the Lead Details will display.
- Map Fields: Select each of your fields that apply to the defined value. You can define other values by using the bottom-left dropdown in this section. If you need to add a custom field, select “Add Custom Key” in the dropdown and use the Zoho CRM field API name as the key. You can check the API names for your fields in your Zoho CRM account Setup -> APIs screen, selecting API names.
- Lead Owner: Select the person to be the owner of the new lead.
- Lead Rating: Assign the lead a rating.
- Lead Source: Select the source of the lead to be associated with the new lead
- Lead Status: Assign the lead a status.
- Lead Description: Add additional details about the submitted lead. This field supports both static text, as well as merge tags to dynamically insert data based on the form submission.
Additional Options
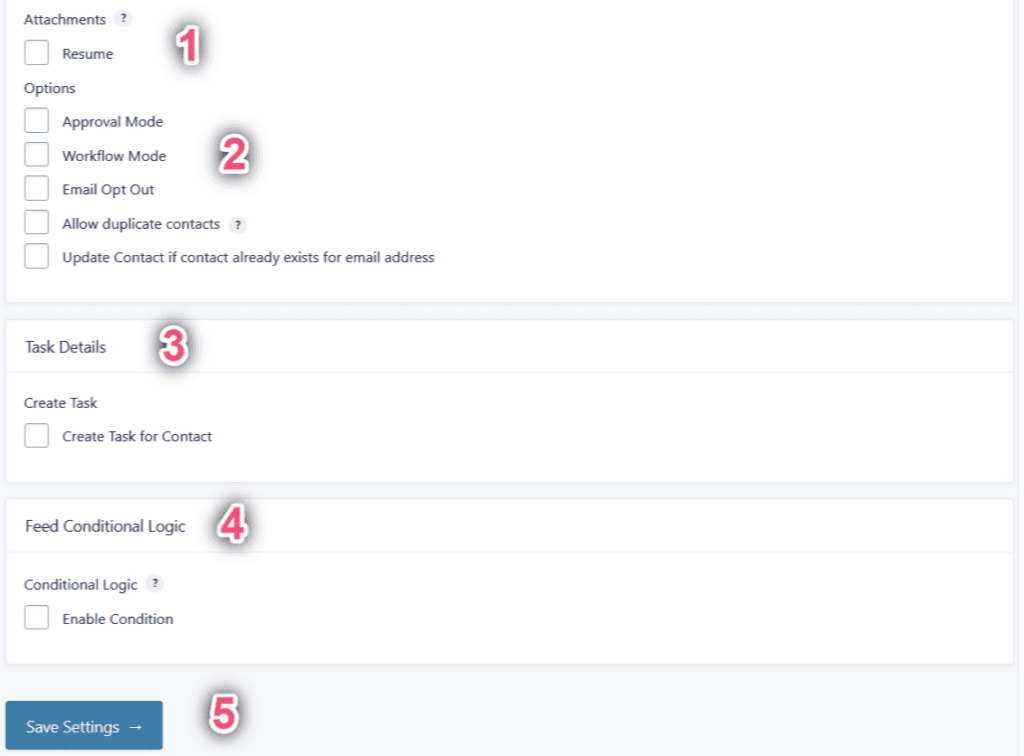
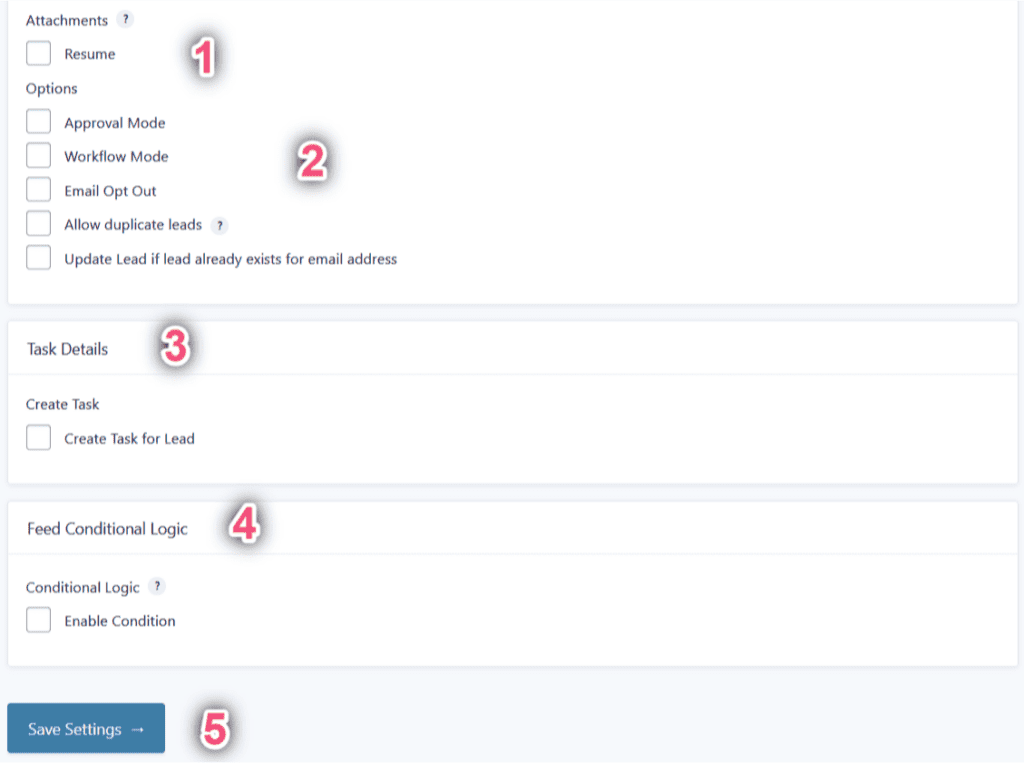
These additional options are available for both New Lead and New Contact creation, but the wording will differ slightly (lead vs. contact) depending on the type of feed you are configuring.
- Attachments: if you have file upload fields in your form, you will have the option here to send them to Zoho CRM with your Contact or Lead. Note that Zoho CRM has a maximum file size of 20MB. Any file larger than this will not be uploaded. Additionally, files will not be uploaded if you have reached the storage allocation for your Zoho CRM account. This option will not appear if there are no file upload fields in your form.
- Options available are Approval Mode, Workflow Mode, Email Opt Out, Allow duplicate contacts, and Update Contact (or Update Lead). Simply select these options based on your particular needs. The most notable of these options is the Update Contact (or Update Lead) option which will update the information if the contact/lead already exists within Zoho CRM.
- The Task Details option allows you to create new tasks for the new contact or lead. Once this checkbox is selected, you may then define the Task Subject, Days Until Due, Owner, Status, and Description.
- Conditional Logic: If unchecked, every successful form submission will be sent to Zoho CRM. If you wish to set specific conditions for sending form data to Zoho CRM, then check the “Enable” box and fill out your required criteria.
- Click the Update Settings button to save your options.