Pre-Requisites
- Download and install the add-on
- A GetResponse account
Getting to your Settings Page
To access the add-on setting page you will need to be logged into your WordPress admin dashboard. On the left-side navigation menu, hover over Forms and click on Settings. From there, click the GetResponse tab.
Settings
Refer to screenshot at bottom.
API Key
Enter your GetResponse API Key. Your GetResponse API account information can be found by logging into your GetResponse account, going to the Integrations & API page, clicking on the API link from the left side menu, and accessing your API key information.
We support the newer v3 of the GetResponse API from add-on version 1.2.1. Earlier versions of the API are no longer supported.
Account Type (version 1.2.1+)
The GetResponse API v3 uses different endpoints for their MAX (360/Enterprise) plan. As such, you must specify the GetResponse plan you are using in order for us to direct API calls to the proper place. Choose MAX if you are on that plan, or Standard for all other plans.
When the MAX account type is selected additional settings will be displayed for the Domain (v1.2.1+) and Endpoint (v1.4.2+).
When you click Save Settings, you will be notified by a green check mark beside the API key box if all seems good. If you do not see a green check mark, double check your information and try again.
Next Steps
You will want to create a feed in order to begin sending information to your GetResponse account. Refer to this document for instructions.
Add-on Framework Hooks
Because the GetResponse Add-On is built using the Add-On Framework it also inherits any hooks available in the framework methods it uses such as:
- gform_short_slug_field_value for changing a field value before it is passed to GetResponse.
Screenshot
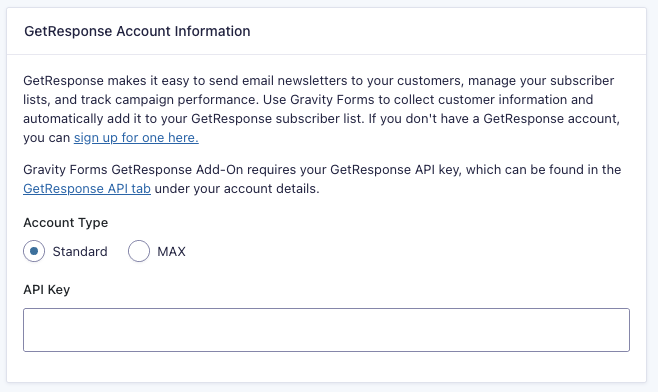
Caption: GetResponse Add-On Settings as of version 1.2.1 and higher.???????????