Pre-Requisites
Zapier Transfer requires our Zapier Add-On v4.2 or later.
Introduction
Zapier is an add-on that allows you to trigger an action upon submission of a form. Zapier Transfer allows you to pull all prior submissions from a form and process actions against those submissions in bulk at one time using Zapier actions.
Note: While you can still do manual transfers to copy data from an existing Zap, you can no longer configure Transfers as a separate scheduled process.
The options to transfer data from existing Zaps is only available in the following situations:
- When you first Publish the Zap.
- When there has been a service interruption, you will have the option to transfer to “catch up” on the data from your existing Zap.
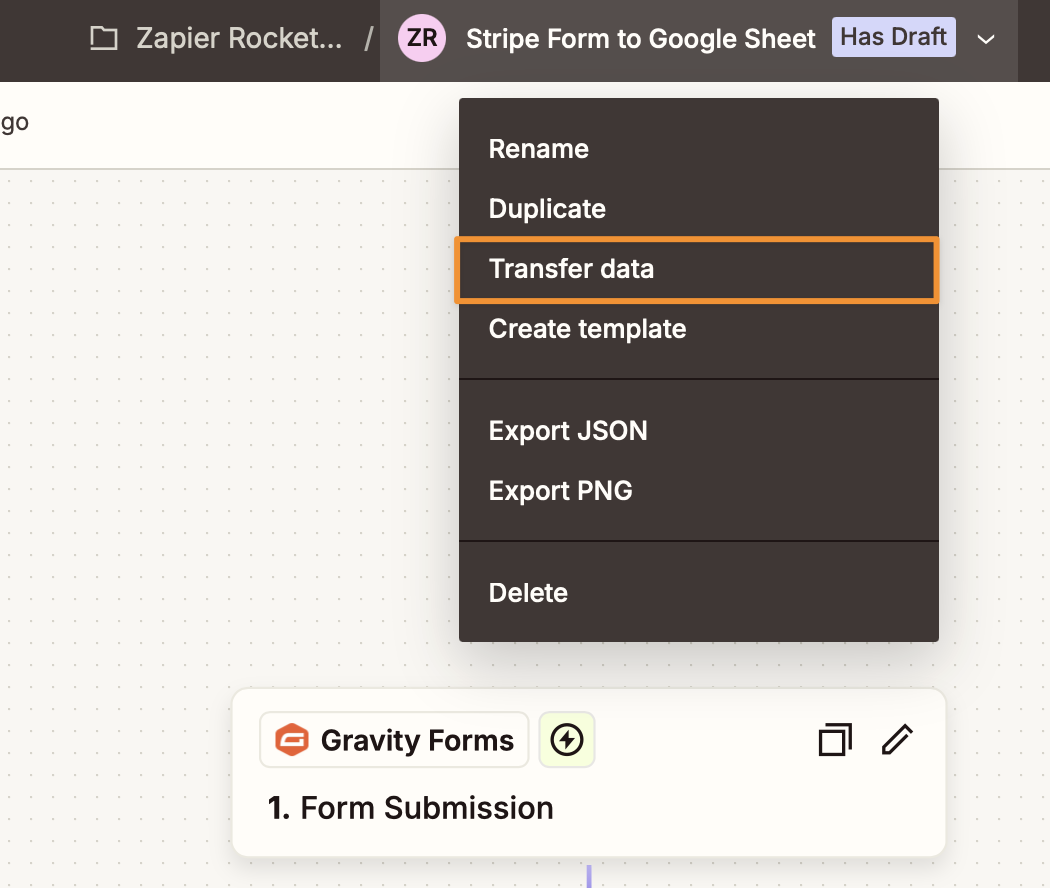
- You can access the menu for Transfers directly from the ‘Zap Name’ contextual menu area of the Zap Editor.
Setup the Transfer
Note: The entirety of the Transfer setup is handled at Zapier, so the screens we’re including are subject to change as Zapier changes its interface.
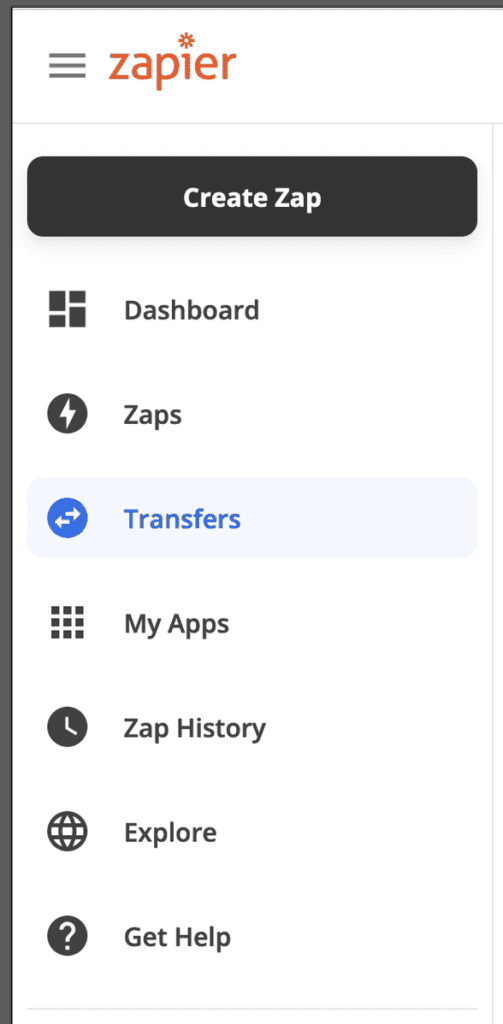
To access Transfers, log into your Zapier account and select Transfers from the left-hand menu.
You’ll be presented with an Introductory Splash screen (temporarily) and then be presented with a screen to select the Source and Destination applications.
Select Source & Destination Applications
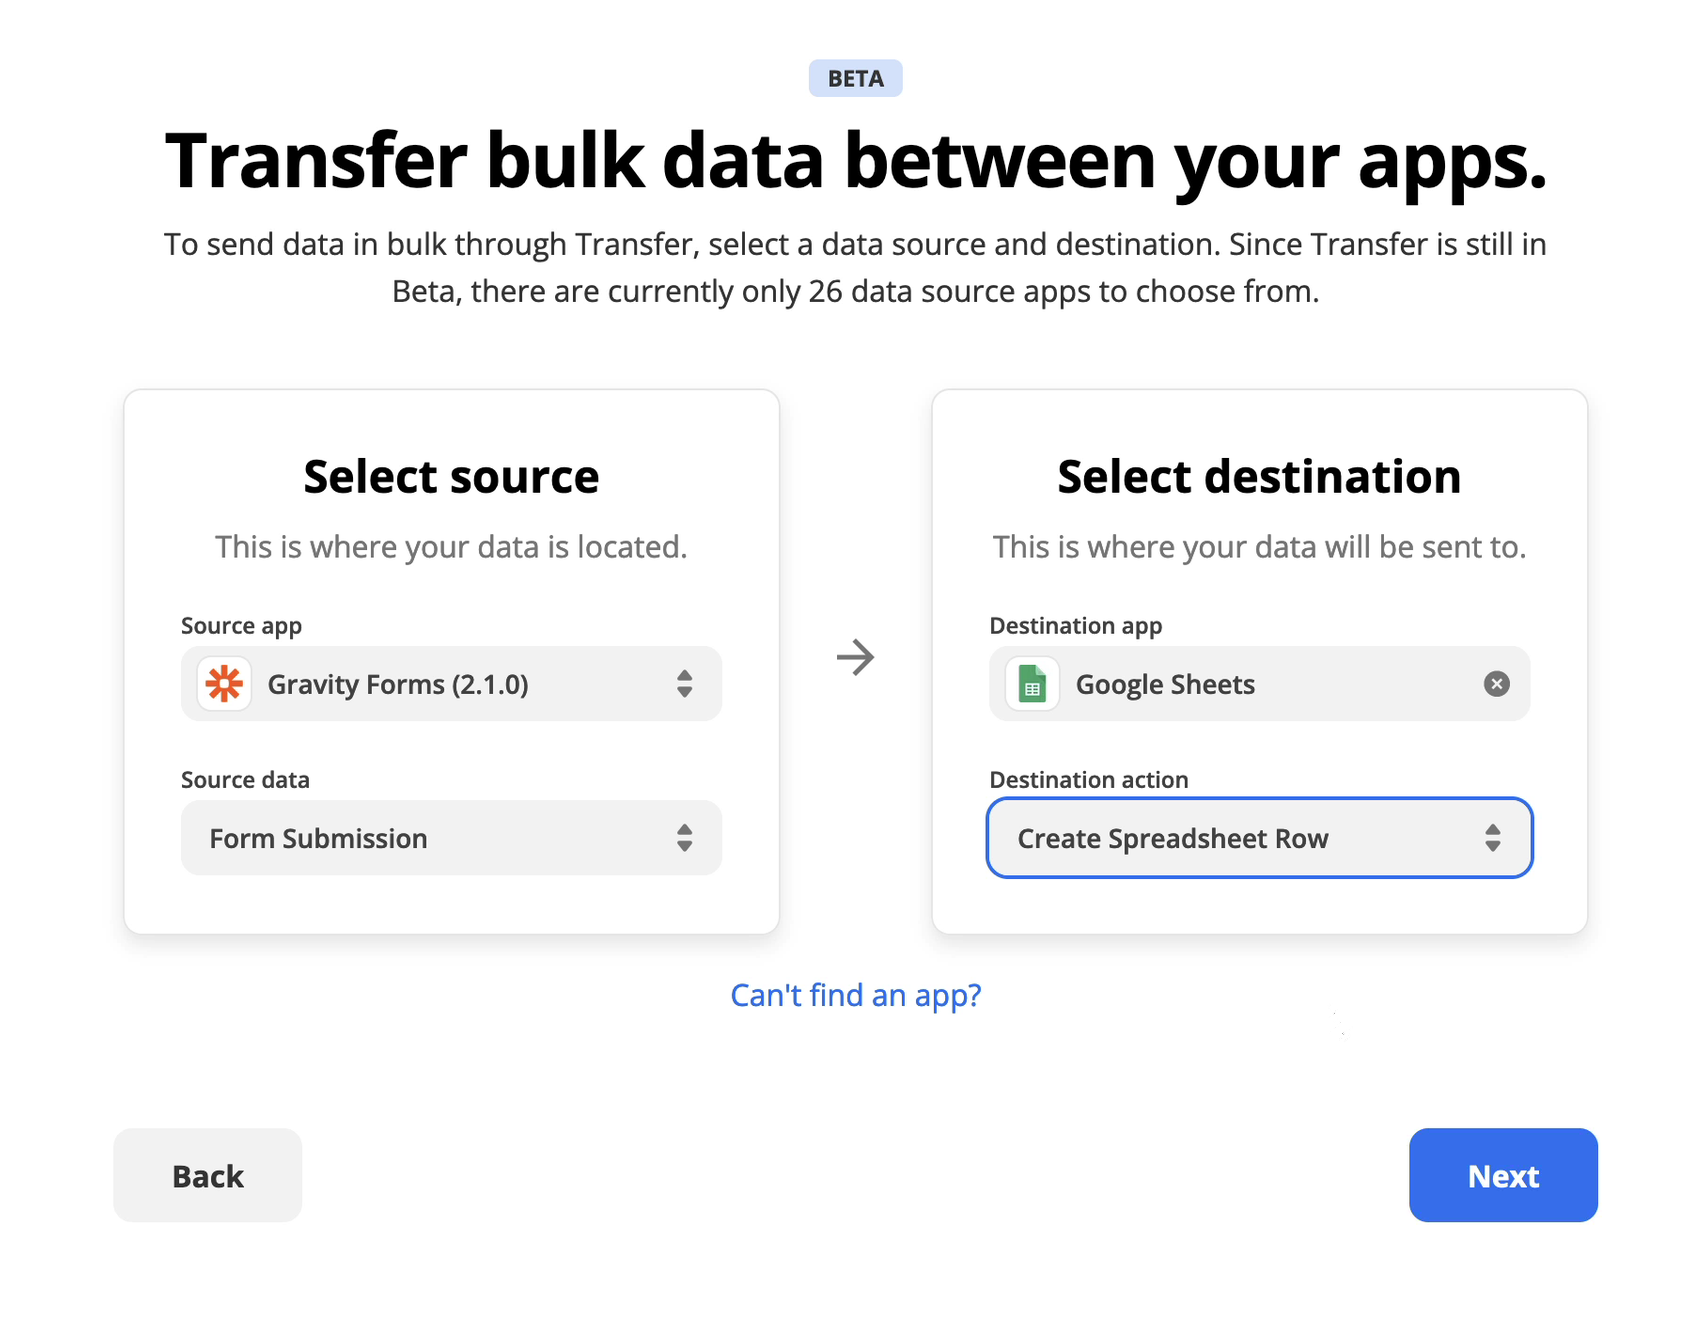
| Field Name | Description |
|---|---|
| Source App | Select ‘Gravity Forms’ |
| Source Data | Select ‘Form Submission’ |
| Destination App | Select from the list the Application you’re feeding your Gravity Forms Data into. |
| Destination Action | Select from the list the Application Action that should be performed against the data received from Gravity Forms. |
Click Next to confirm your source data and destination action.
Connect to Gravity Forms
You’ll be presented with the screen to Connect your Gravity Forms Account.
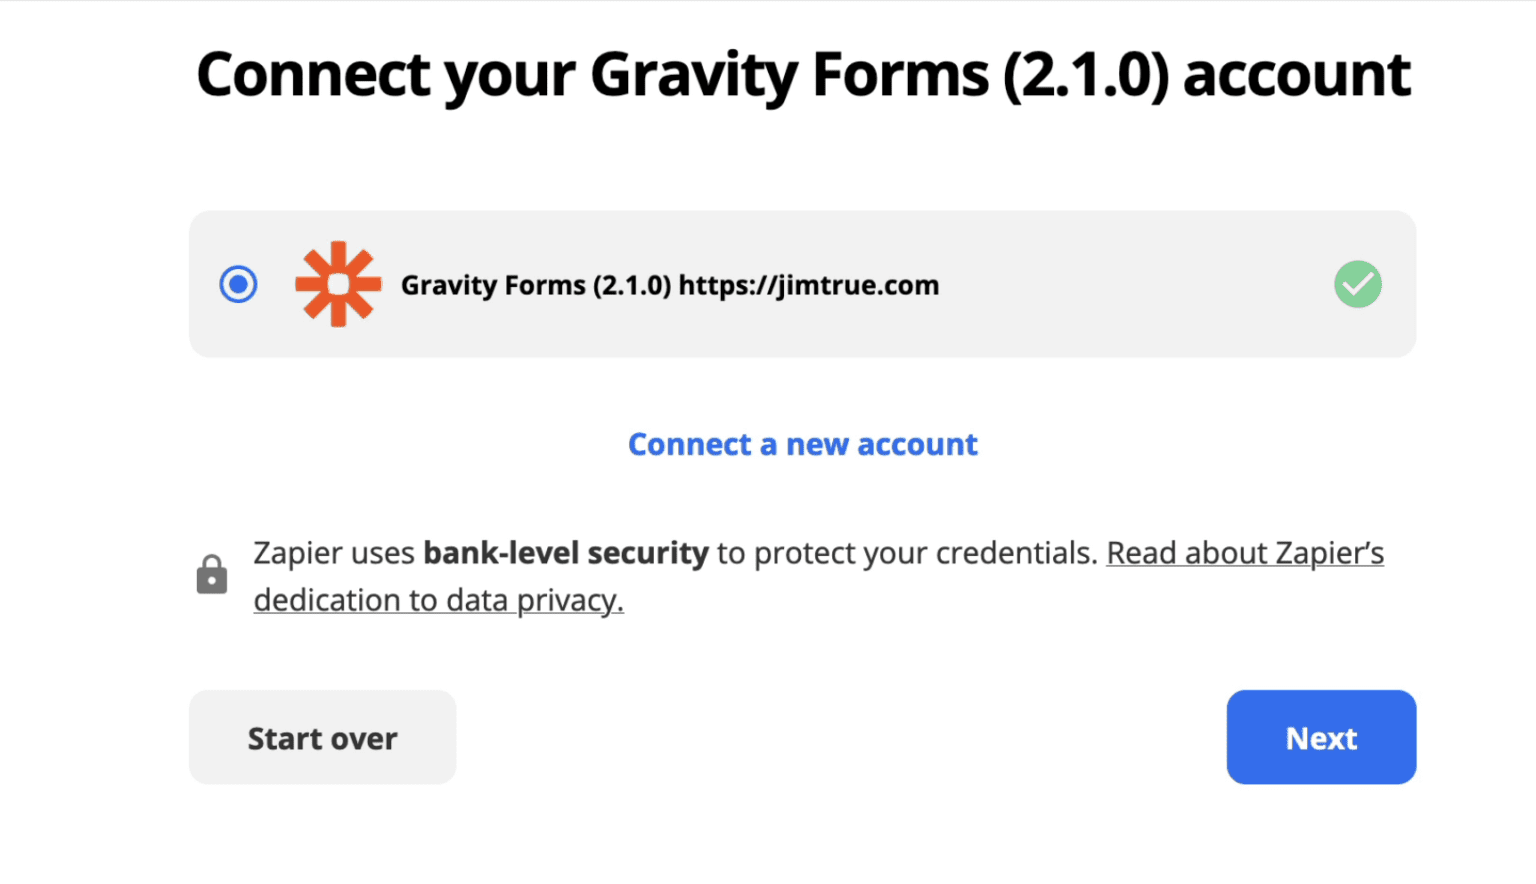
If you haven’t configured a connection at Zapier yet, you will need to select Connect a new account and walk through the connection process detailed in Setting up the Zapier Add-On. If you’ve configured a connection, you can select it from this screen and click Next.
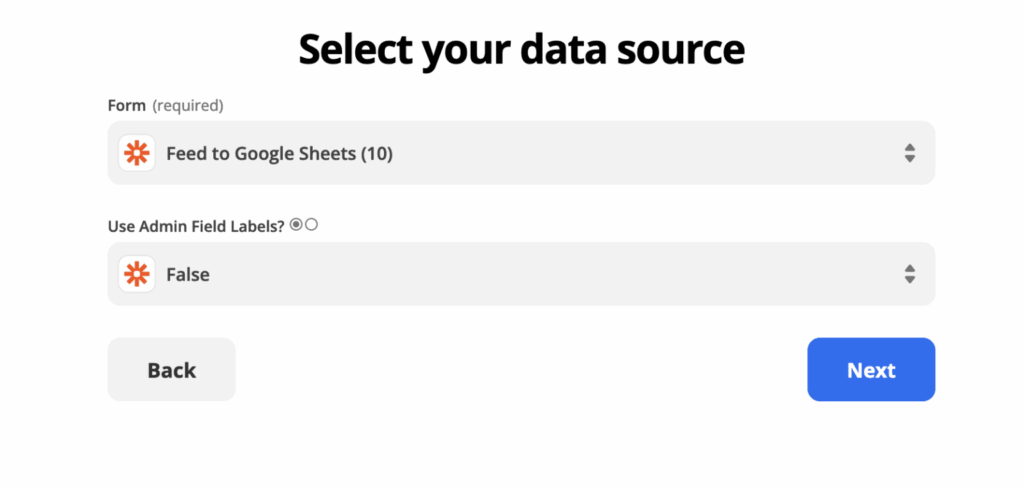
Select your data source
You’ll be presented with the next screen to Select your data source from Gravity Forms:
| Field Name | Description |
|---|---|
| Form | Select a form from your website. |
| Use Admin Field Labels? | Select False to use the Field Labels in your field mappings (default setting). Select True to use the Admin Labels added under Field Settings, Advanced. |
Click Next to confirm your data source settings from Gravity Forms. You’ll receive a message “Getting data from Gravity Forms” and then be presented with the screens to map your Destination application & actions.
Select your Destination settings
The settings screen for destination will depend on what application you have chosen at Zapier. For this example, we’re using Google Sheets as the Destination Application.

Map data from Gravity Forms to Destination App
Once you’ve selected the Destination Application and its initial settings, you’ll be presented with the Field Mappings screen. The field available for mapping will depend on the fields available in your destination application. For a Google Sheet where you’re creating Spreadsheet Rows, you’ll be presented with the columns in the spreadsheet. In the example below, we’ve completed mapping the fields from the form.
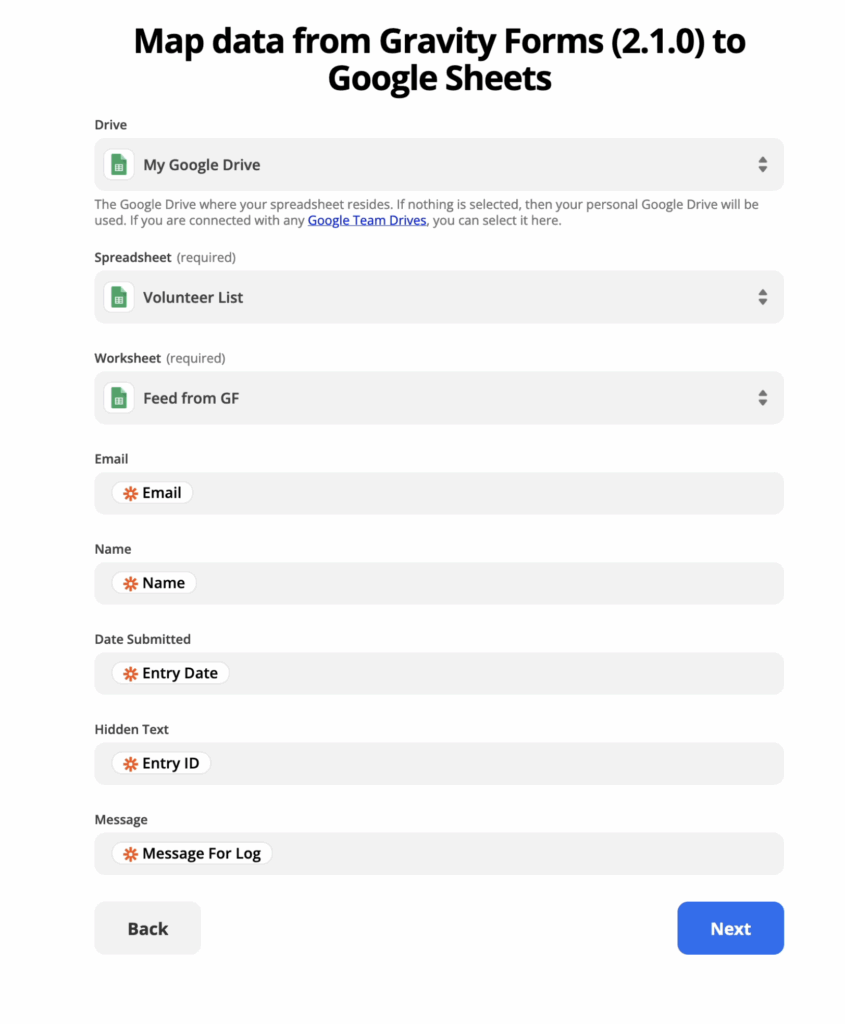
Click Next button to confirm the field mappings.
Confirm Fields are Mapped Correctly
Once you’ve mapped your fields, you’ll be presented with a screen that will show your actual entries from your form mapped to the fields for confirmation.
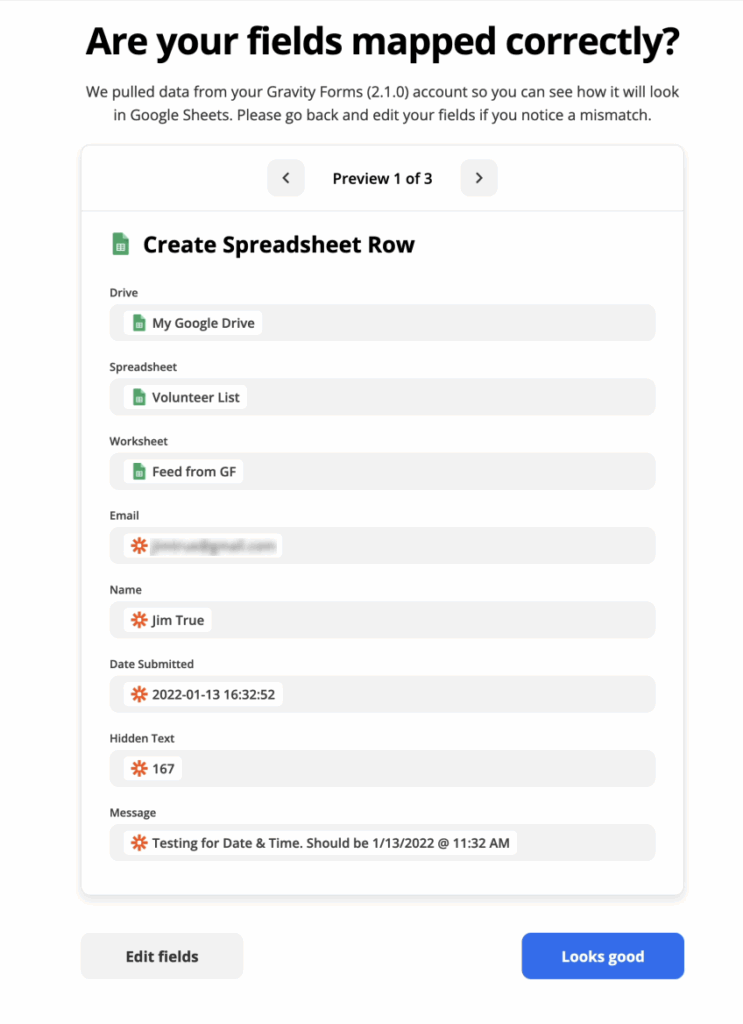
You can page through the confirmation (it loads with a preview of 3 entries) and if you’re good with the field mapping, click Looks good to start the transfer selection.
Review your data to start the Transfer
Once you’ve confirmed your field mappings look correct, the transfer process will load a list of all your entries in a table view.
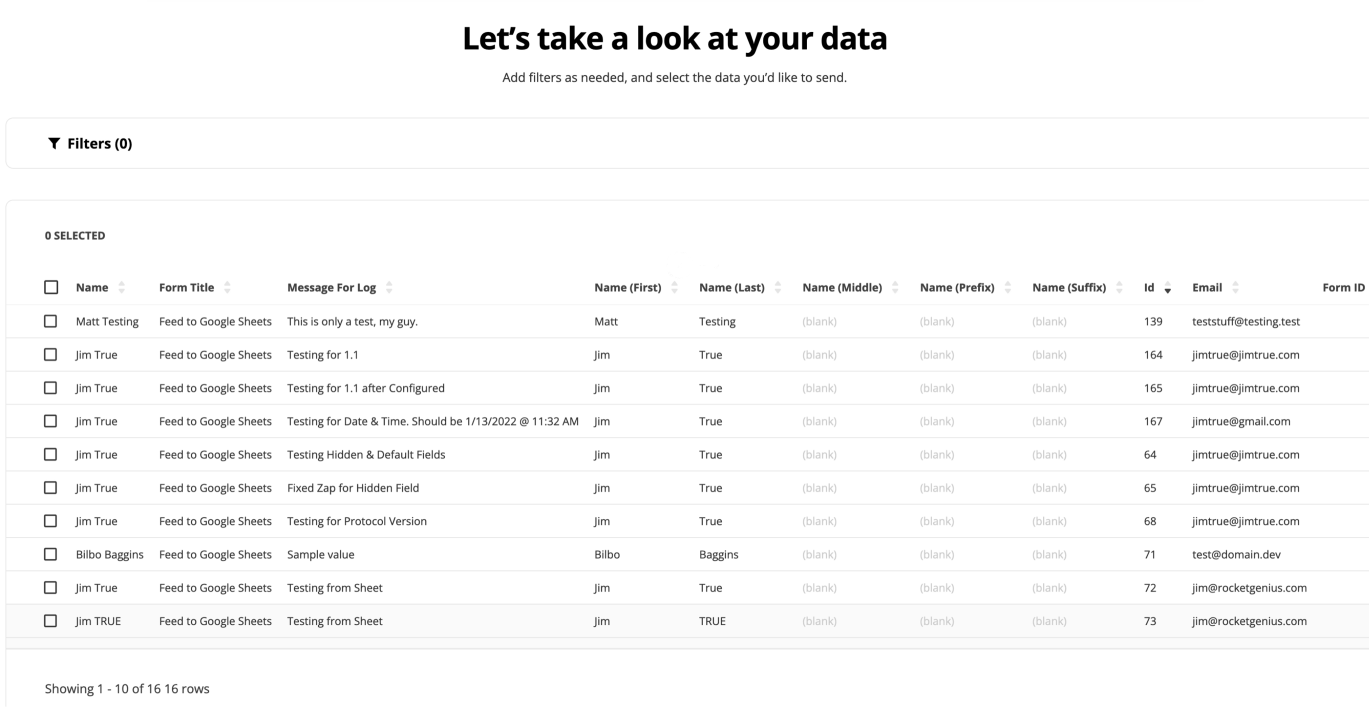
You can apply filters to this list and confirm the entries you want to send to the Transfer process. You can learn more about the filters by consulting the Transfer documentation at Zapier. Once you’ve confirmed your selection, you’ll be provided the final confirmation before starting your Transfer:
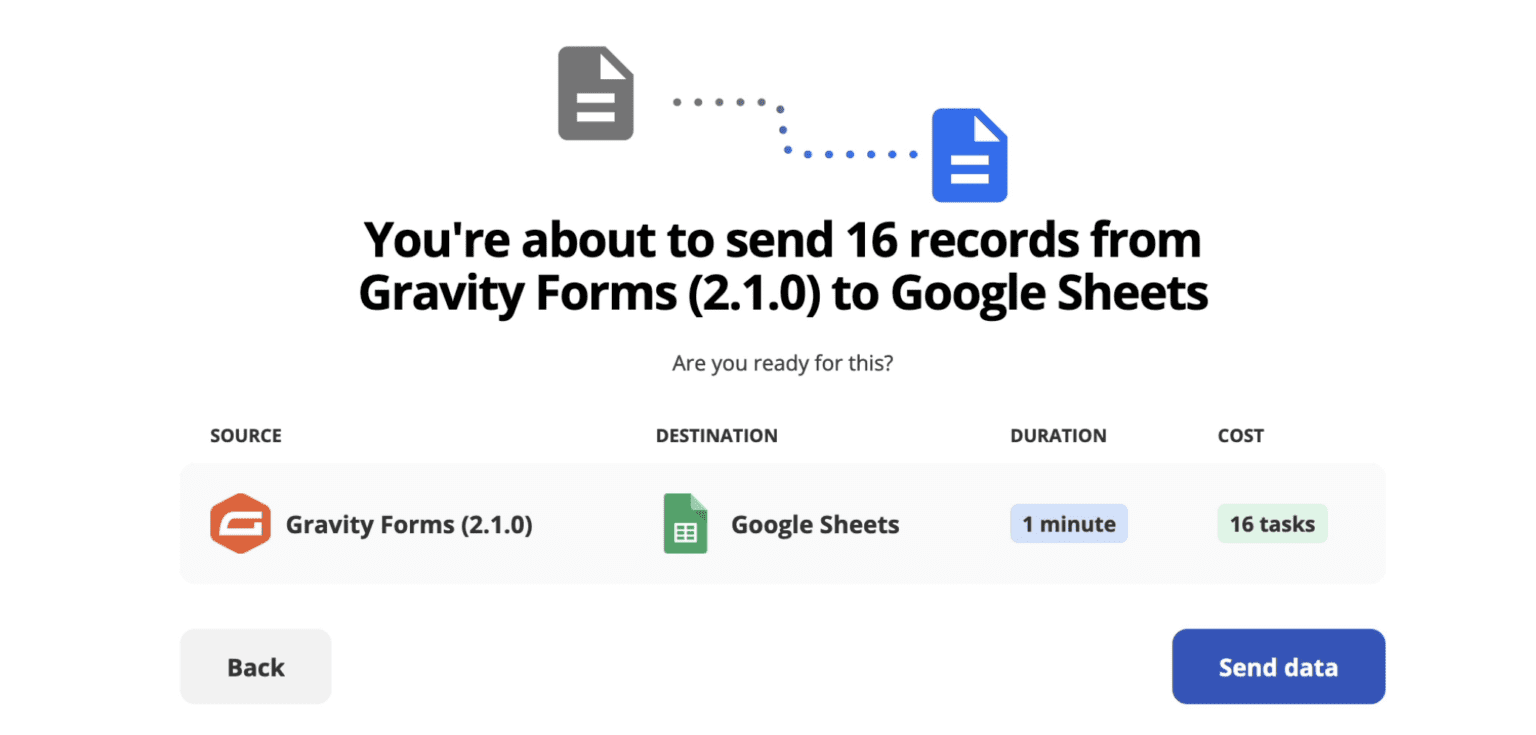
This will confirm your Source and Destination and the cost in the number of tasks that will be run at Zapier. Once you’re good with this select, click Send data to start your transfer.
Known Limitations
- Zapier pulls all records from Gravity Forms at once (in batches of 100 records), but only sends them to the destination application in groups of 4 records at a time during the Transfer process. Because of that, the records may not be in a specific order when they arrive in their destination application. You may need to perform additional processing at the destination application if the sort order matters to your final processing.
- The Transfer function at Zapier is in beta; if you run into any issues with processing data in Zapier Transfer, you should escalate the issue to Zapier customer support first.