Pre-Requisites
- Download and install the add-on
- A Zapier account
Signing up can be done quickly and easily and includes a 14-day free trial which gives you access to every regular and premium app. After the free trial, you can continue to use the free plan or select one of the available premium plans. - An account that has the gravityforms_edit_forms capability, for use in the REST API Settings. This account must be given the ‘Read/Write’ privileges.
- SSL Certificate Installed and Configured
- Website accessible to the Internet. The authentication from Zapier to Gravity Forms uses REST API so your website must be accessible to Zapier.
Terms Used
There are two ends to a communication between Zapier and your Gravity Forms, and it is important to distinguish which one is being referred to in the user documentation.
- Zapier Add-On (or Gravity Forms Zapier Add-On), refers to the add-on module that is developed and published by Gravity Forms, and made available to Gravity Forms active license holders with the appropriate license type. The Gravity Forms Zapier Add-On is developed and supported by Gravity Forms.
- Zapier’s Gravity Forms app or Gravity Forms app refers to the Gravity Forms integration application that is developed and supported by Zapier. These apps are made available within the Zapier environment for use in Zaps. Zapier apps are developed and supported by Zapier.
- Zapier Account Dashboard refers to the account portal provided by Zapier for registered users to login and manage Zapier applications. See this link.
Setup
Create a REST API Key to Connect to Zapier
To establish communication between your WordPress site and Zapier, you will need to create a Gravity Forms REST API 2 key to identify your connection to Zapier.
The user selected when creating the REST API key must be assigned to a role which has the gravityforms_edit_forms capability. You must also provide the ‘read/write’ access when creating the REST API key.
Follow these steps in the Forms > Settings > REST API to create a new Consumer Key and Consumer Secret. Save this information in a secure place as you will need it for the next step to Authenticate at Zapier and you will not be able to edit or access this information again without creating a new REST API key.
Authenticating at Zapier
Now that you have your Consumer Key & Consumer Secret, go into My Apps in your Zapier Account Dashboard, click on Add Connection and search for Gravity Forms
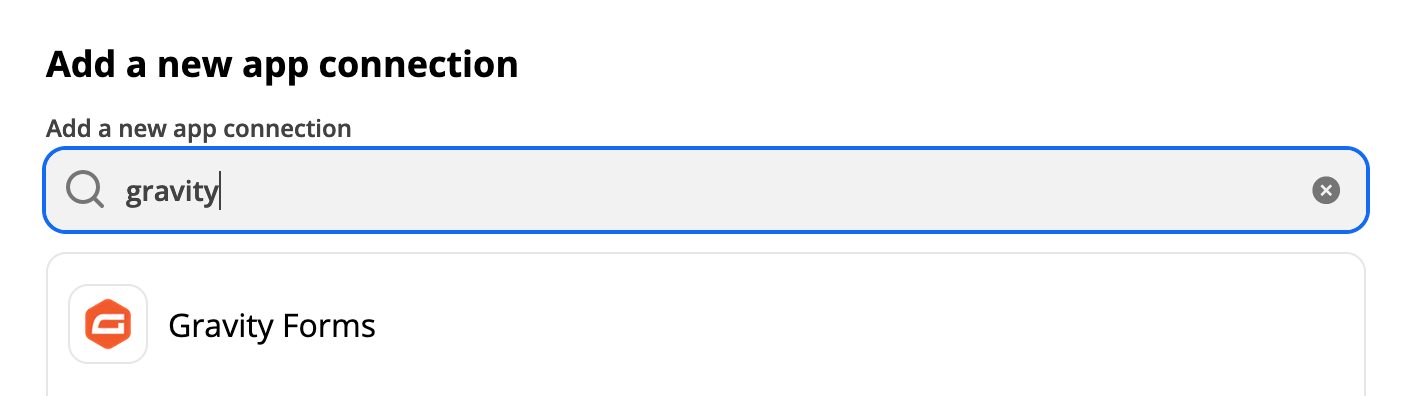
Click on Gravity Forms and you’ll be presented with an Authentication screen from Zapier to “Allow Zapier to access your Gravity Forms Account”
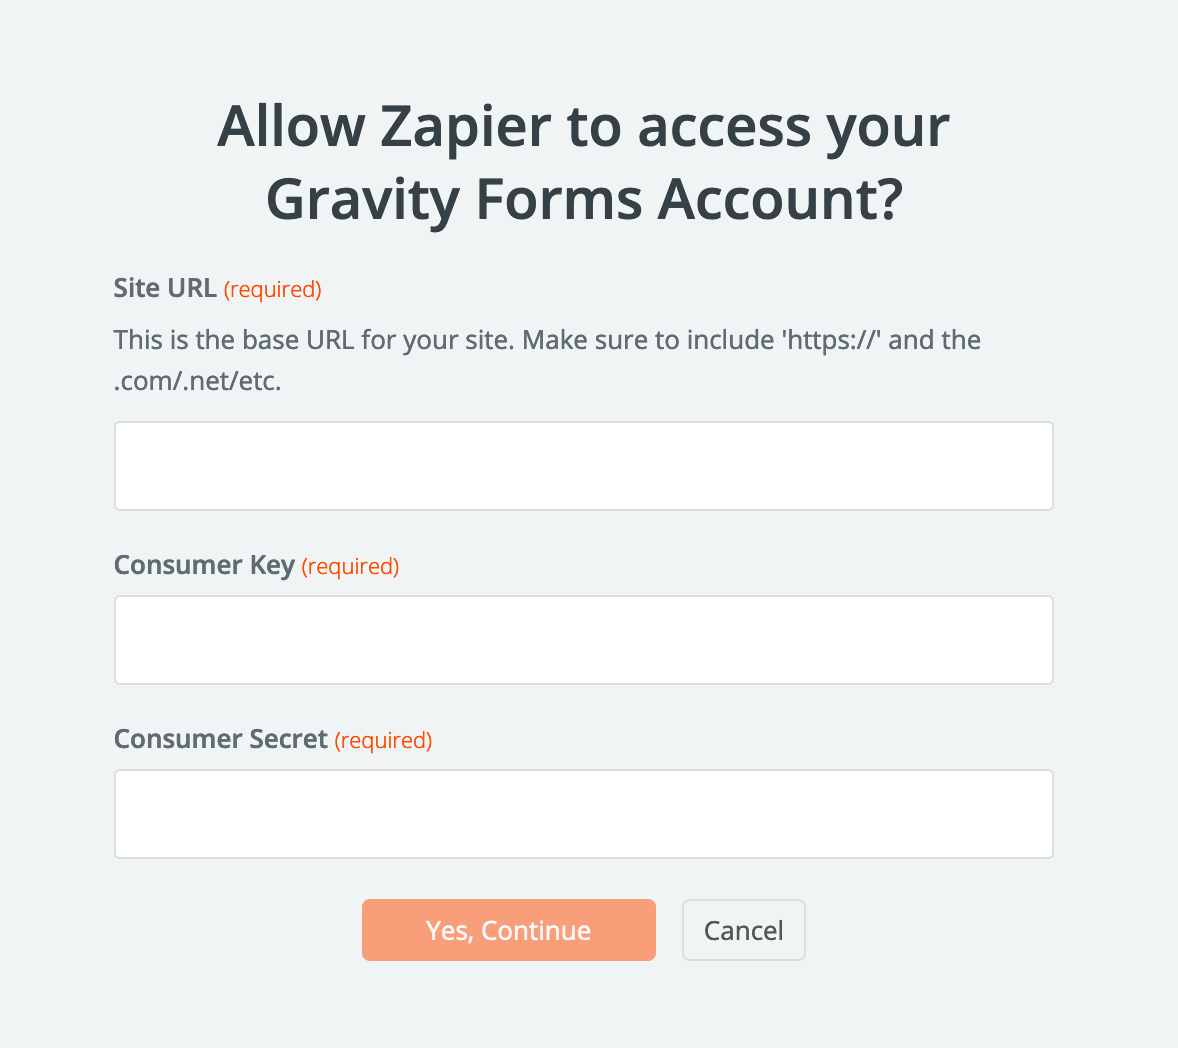
Complete the steps to authenticate with your website through REST API:
- Site URL: The Site URL is the base website URL where your form resides, ie https://jimmyspizza.com or https://shops.sallysdoughnuts.com. You can pull the Site URL from your Settings > General > Site URL in the WordPress dashboard.
- Consumer Key: Collected from your step above when creating the REST API Key
- Consumer Secret: Collected from the step above when creating the REST API key.
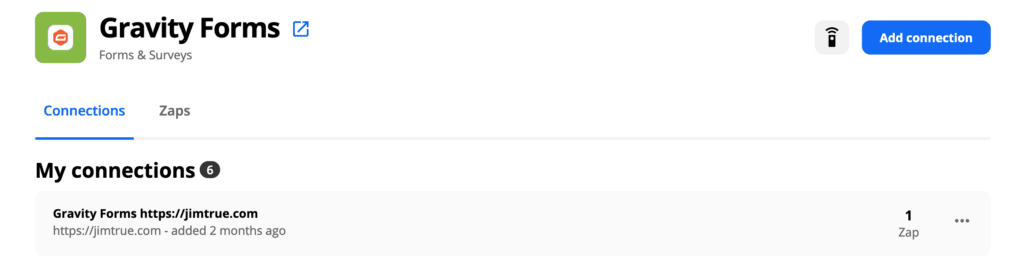
If your connection is successful, you’ll be returned to your Gravity Forms connections in the Zapier Account Dashboard and your new connection will be listed:
If your connection is not successful, you’ll be presented with an error in the Authentication dialogue and you will need to begin troubleshooting your connection or open a Support Ticket with Gravity Forms.
Once you have installed and authenticated the Zapier Add-On, you’re ready to begin using the Zapier Add-On.
Changes Between Zapier Add-On 4.0 and Prior Versions
Under prior versions of our Zapier Add-On, authentication to Zapier was managed at Zapier under Zaps with a webhook provided by Zapier and entered under the Zapier Feed Settings for each individual form. This was the Zapier v1.0 connection.
Under the current version of the Add-On that supports Zapier v2.0, authentication is managed at Zapier under My Apps using the REST API settings in Gravity Forms, Forms, Settings, REST API to create a website specific connection for Zapier. This allows you to have one App for each website under the Zapier Add-On for Gravity Forms and you can use the same Zapier App connection to manage multiple forms in your Zaps.
When troubleshooting your existing Zaps, you’ll know if your Zap is an “App Connection” (Current) or a “Zap Connection” (pre 4.0) if:
App Connection (Zapier v2.0+) – REST API

- Gravity Forms App under Custom Integrations in Zapier includes ‘Gravity Forms’ (see screenshot above)
- Feed exists for the form within Gravity Forms (if you have toggled on Feed Visibility), but you can only edit Conditional Logic. All other feed settings are maintained at Zapier.
- Feed URL starts with (https://hooks.zapier.com/hooks/standard/*)
Zap Connection (Zapier v1.0) – Legacy Webhook

- Gravity Forms App under Custom Integrations in Zapier includes ‘Legacy’ and ‘Gravity Forms (1.1.0)’ (see screenshot above)
- Feed exists for the form within Gravity Forms and you can edit all details for the feed.
- Feed URL starts with (https://hooks.zapier.com/hooks/catch/*)
Troubleshooting Connections with Zapier
If you run into issues connecting the Zapier Add-On at Zapier, please check out Troubleshooting the Zapier Add-On to help you get connected properly.
Conclusion
After you have installed and activated the Zapier Add-On, there is not much you need to do until you are ready to integrate a form with Zapier. There are no global settings or API keys that must be configured.
The Zapier Settings page that appears within the global Settings in Gravity Forms is only for uninstalling the Zapier Add-On and its associated data in your WordPress database. Zapier integration takes place primarily on the Zapier site itself and then from within the Form Settings of a form you would like to integrate with Zapier.
Once you have installed and activated the Zapier Add-On, you’re ready to begin using the Zapier Add-On.