This guide applies to Zaps created with the legacy Zapier Gravity Forms Application. New Zaps created within Zapier with Gravity Forms (as either a trigger or an action) will look different now. Additionally, web hooks and feed setting are not required under the new REST API authentication. We are working on an updated version of this guide, but until then, please refer to the official Zapier documentation.
Pre-Requisites
Introduction
Zapier is an add-on that allows you to trigger an action upon submission of a form. Unlike some other plugins, Zapier does not require an API key to be configured, making this one of the easiest plugins to set up. All that needs to be done is create a form and map a feed.
Setup
If you would like to use a pre-existing form, you may skip to step 2. However, if you have not already created a form, you will need to create one in order to integrate the Zapier Add-On with Gravity Forms.
- Create your form. No specific fields are required.
- Create your Zap. Begin by logging in to your Zapier account. If you do not have an account, you can sign up for one here.
- Click the Make a Zap! button located in the header of Zapier’s site.

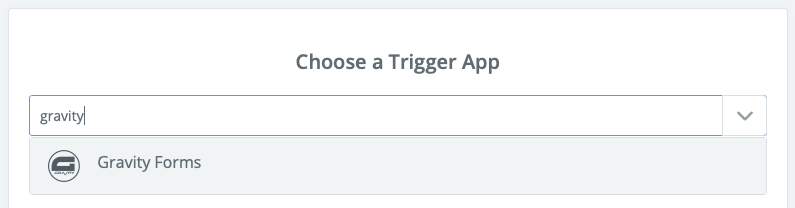
- Select Gravity Forms as your trigger application.
- Then select New Form Submission as the trigger.
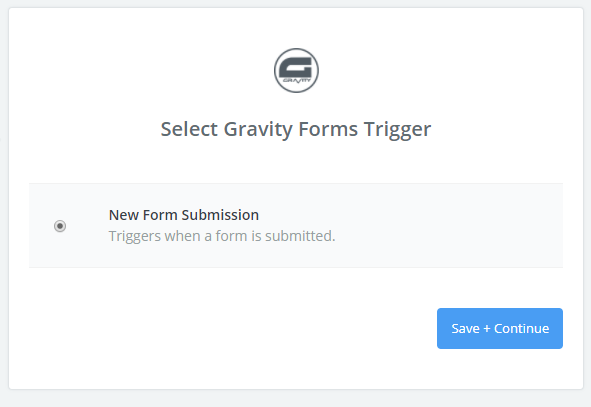
- Click the Save + Continue button.
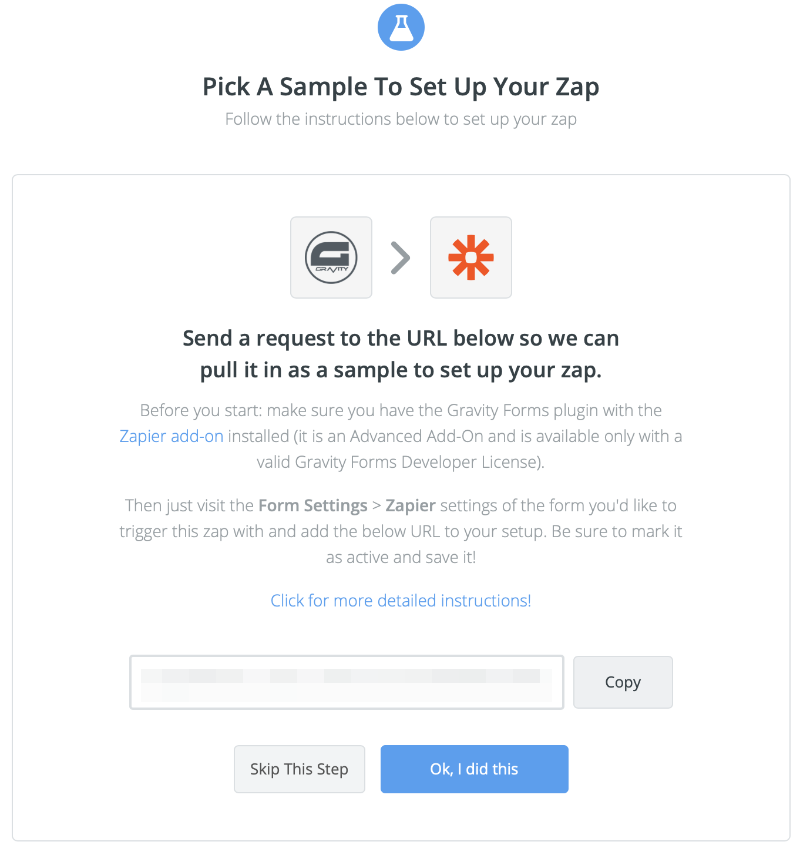
- You will then be presented with the step to Pick A Sample To Set Up Your Zap. Directions on how to do this are displayed on the page and in the next few steps of this article.

- Before you can click the “OK, I did this” button, you must set up your feed in Gravity Forms and add the displayed URL to your feed as the Webhook URL. To do this, go to the Settings for your form and select Zapier.
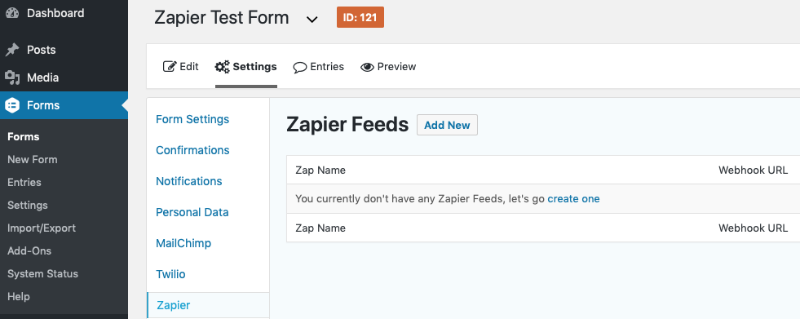
- Click the Add New button.
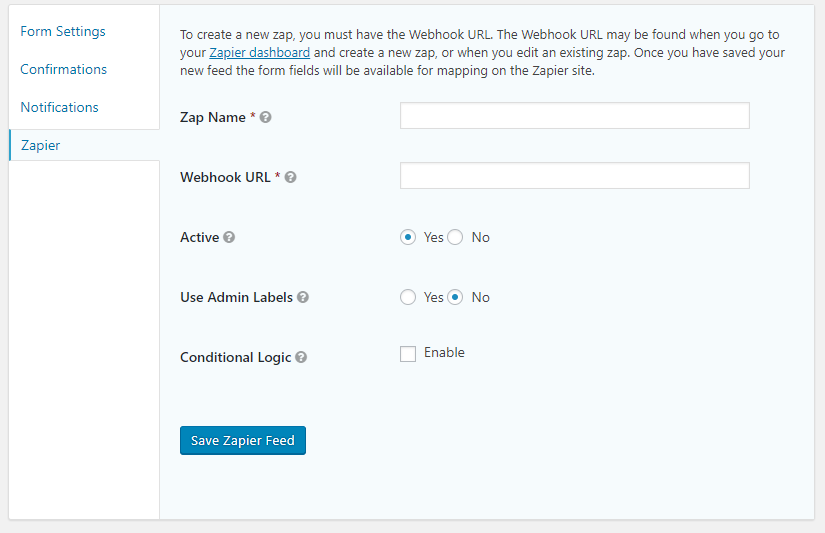
- Fill out the feed settings. First enter a Zap Name. Then copy the URL displayed on Zapier’s website into the Webhook URL. Next, mark the Zap as Active. Lastly, click the Save Zapier Feed button. Once you save the feed, the form fields and sample data are sent to Zapier which populates the fields available for use with the application to which you choose to send your data. For more information on setting up the feed, please see the Creating A Feed For The Zapier Add-On article.
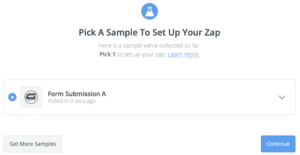
- Return to your setup on Zapier’s site and click the OK, I did this button.
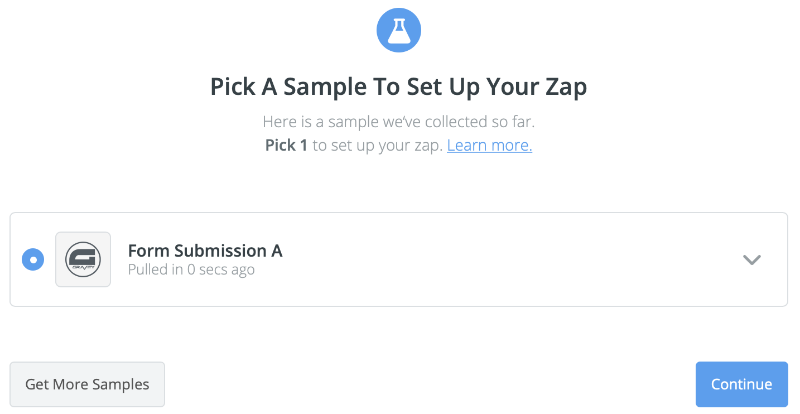
- The form submission pulled by the Zap will display. Click Continue.
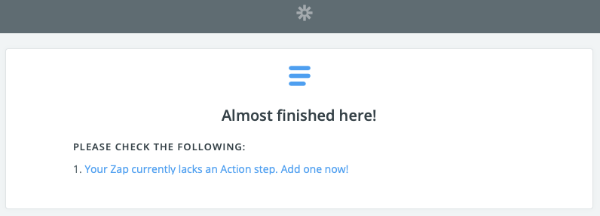
- You will see Almost finished here! Click the link to add the Action step.
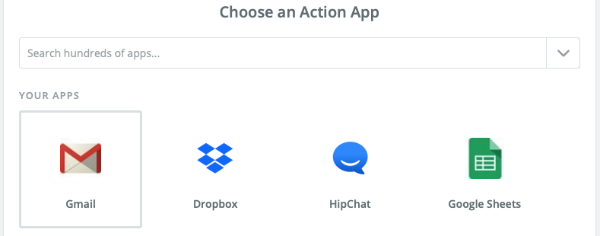
- Select your Action App and which action you wish to use. The action app is simply the application with which you want your submitted data to interact. In this example, we will be using Gmail. Each application has its own actions and steps to configure. If additional help is needed setting up the trigger or action application, check out Zapier’s documentation page.
- Select the action you would like to happen when the form is submitted. In this case, we will be sending an email.

- Click the Save + Continue button.
- Finish the steps as necessary to configure your action app.
- Test your action by clicking the Send Test button.
- Once the testing is successful, click the Finish button.
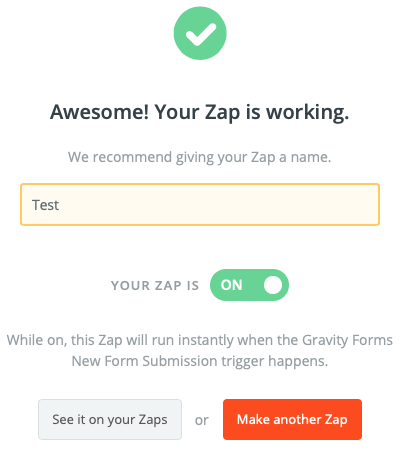
- Now it’s time to name your Zap, and turn it on.
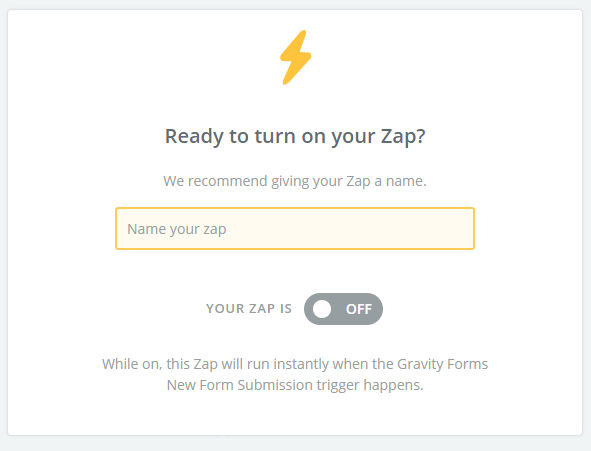
Congratulations! You have successfully created a Zap!