Prerequisites
See the Using the PayPal Checkout Add-On article.
Getting to the PayPal Checkout Add-On Settings
The PayPal Checkout Settings will allow you to connect the add-on to PayPal.
Navigate to the PayPal Checkout Add-On Settings page:
- Log into your WordPress admin dashboard.
- On the left side navigation menu, hover over Forms and click on Settings.
- Click on the PayPal Checkout tab.

Connecting to PayPal
The PayPal Checkout Add-On supports connecting to the Live or Sandbox PayPal environments.
We recommend connecting to the Sandbox environment using a developer account when first configuring the add-on or when modifying existing forms so you can test the forms without interacting with your live PayPal account.
Note: PayPal does not permit connecting to a localhost. Attempting to do so will generate an error message, “Hostname localhost not allowed.” To test locally, try to use a top-level domain such as .local..
You do not need to have an existing PayPal account to connect the add-on, as PayPal will offer you the opportunity to create a new PayPal account whilst connecting the add-on.
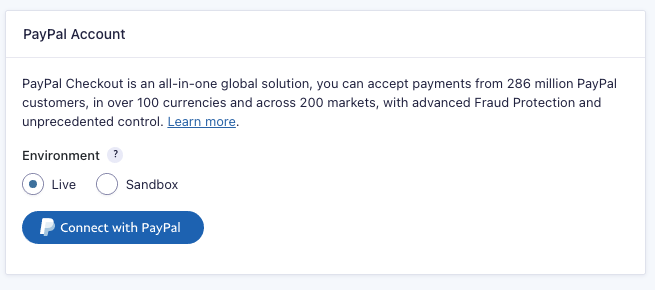
Select the environment and then click the Connect with PayPal button.

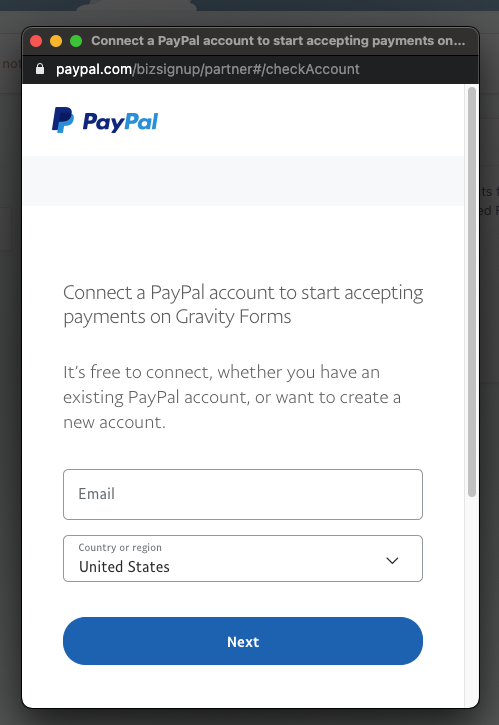
In the PayPal modal which is displayed, follow the steps provided by PayPal to connect to an existing PayPal account or create a new PayPal account.
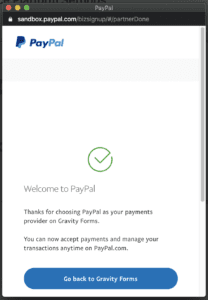
When you have completed connecting the add-on to your PayPal account, click the Go back to Gravity Forms button to close the modal. The add-on settings page will reload.
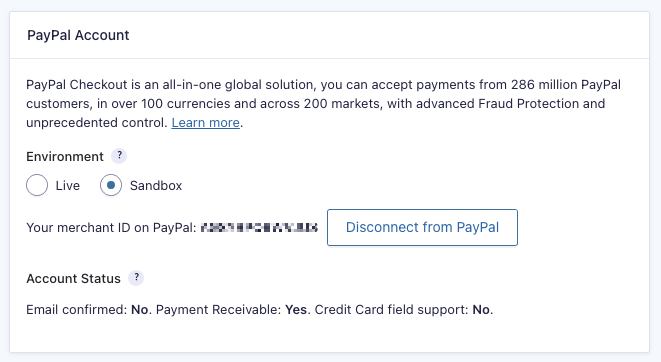
When the add-on is successfully connected, the Connect with PayPal button will be replaced with your PayPal merchant ID and the Disconnect from PayPal button.
Account Status
This is only displayed when the add-on is connected to PayPal, it displays the current status of the PayPal account used to connect to the PayPal Checkout.
Email confirmed
Indicates whether the primary email of the connected PayPal account has been confirmed.
PayPal requires your account email address is confirmed before you can accept payments. See the How do I confirm my email address? article on the PayPal Help Center site.
Payment Receivable
Indicates whether the connected PayPal account can receive payments.
There are many reasons why PayPal can indicate your account can’t receive payments. Please contact PayPal for support with this issue.
Credit Card field support
Indicates whether the connected PayPal account supports accepting payments using the credit card payment method of the PayPal Field
The Custom Card Fields API is in limited release on the PayPal Checkout platform (also known as PayPal Complete Payments). Please check PayPal’s documentation for a list of countries where this feature is available.
PayPal also needs to review your account to enable the feature.
Check with PayPal for the most up-to-date information on requirements and available markets.
If this feature is not enabled for your PayPal account, you can still capture payments using PayPal Checkout which is also available with the PayPal Field.
Webhooks
Webhooks are notifications that PayPal sends to your website whenever specific events happen, such as processing a subscription, issuing a refund, or approving a payment.
Note: In most cases, you won’t need to manually create or configure a Webhook. It is automatically generated during the setup process. If the Webhook is not active, refer to this guide.


