Introduction
Gravity Forms for Stripe allows you to view the form data that was submitted via your Gravity Form to create a Stripe payment, right next to those payment details in your Stripe dashboard.
The app can only be downloaded and installed via your Stripe Dashboard—it is not available from the Gravity Forms Add-On browser or Downloads page.
For general information on the Stripe App Marketplace, refer to this FAQ.
Note that the rollout of Stripe Marketplace Apps is being done in stages by Stripe over July 2022, and as such not all apps may be available to all Stripe accounts immediately.
Note: Marketplace is not a downloadable app installed directly on your WordPress site. The marketplace app is an integrated solution that connects with your site and provides additional functionality through cloud-based services.
Prerequisites
- Gravity Forms with Stripe Add-On integration.
- Gravity Forms for Stripe Marketplace App installed via the Stripe Dashboard.
Connecting the App
The app must be connected from your Stripe account to your Gravity Forms site that holds the forms you wish to display entries from. This connection is done using the Gravity Forms REST API, which requires a host setup suitable for server to server connections.
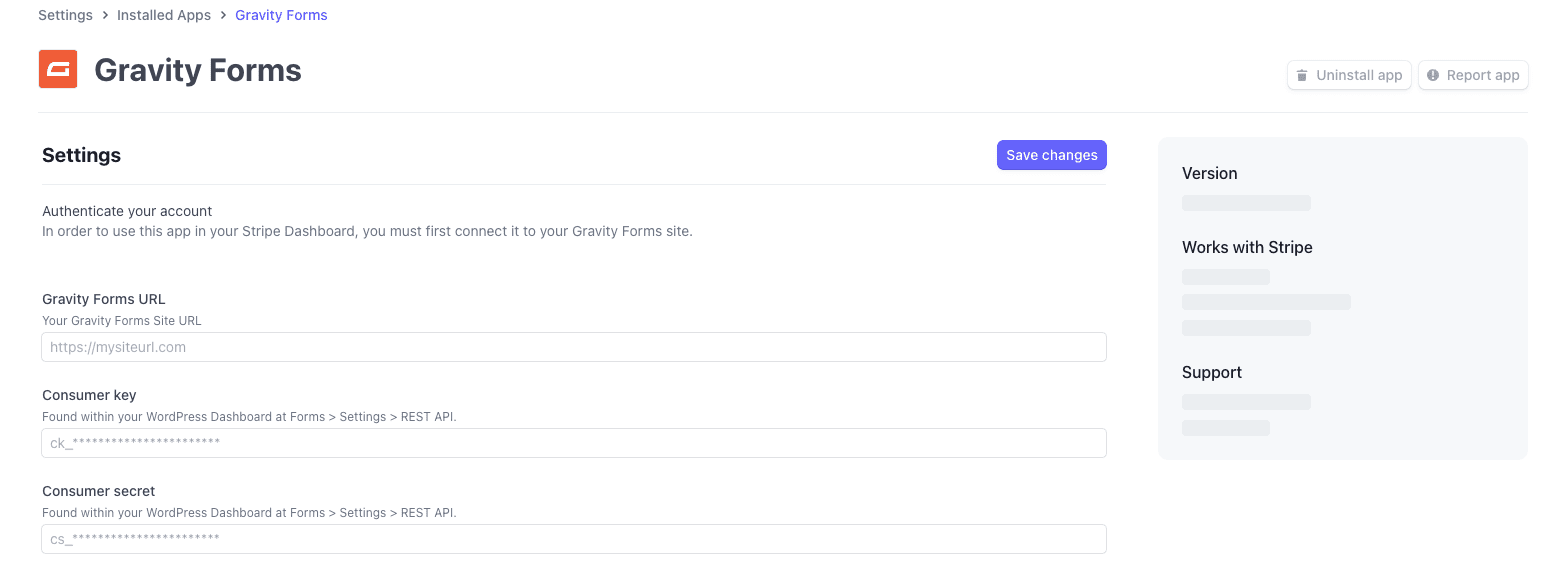
- In Stripe, navigate to Settings → Installed Apps → Gravity Forms
- Following the onscreen instructions (see screenshot below) to enter your:
(a) Gravity Forms Site URL
(b) Gravity Forms REST API Consumer key
(c) Gravity Forms REST API Consumer secret - Save the Changes. You will receive a ✅ Connected green check mark if successful. If connection was not made, refer to our Troubleshooting Guide.
Features
View Entry Details
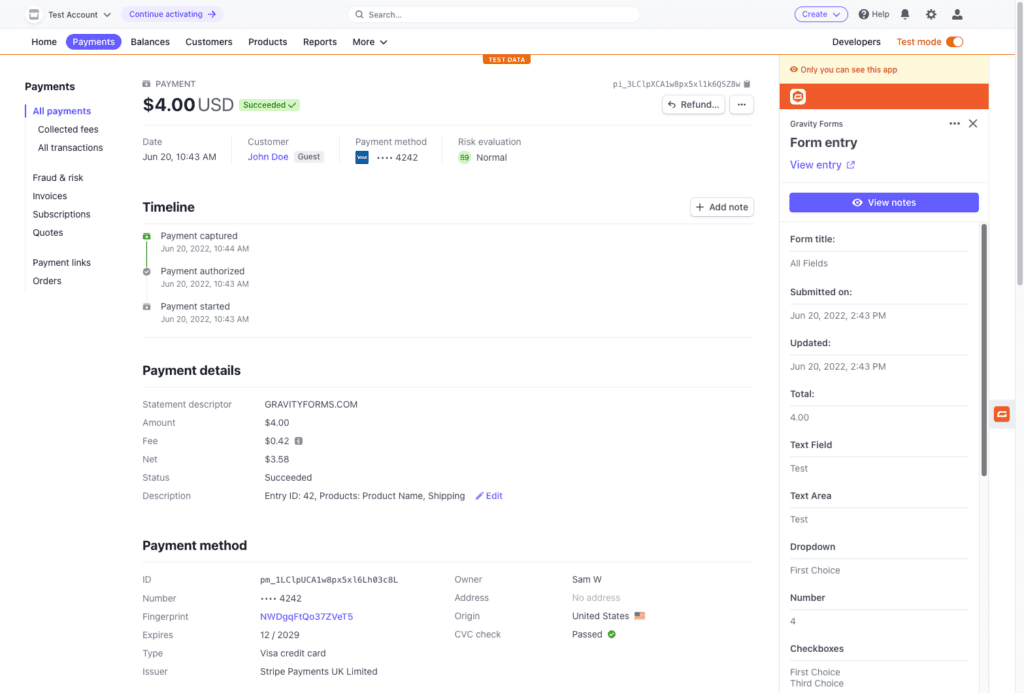
Click the orange Gravity Forms logo in the right sidebar to reveal the Gravity Forms entry that is attached to this payment. Form data as submitted will be displayed in the sidebar.
Note: the app uses a transaction ID stored with the entry to find the right transaction to display. As such it can only display form details if you collected and processed the Stripe payment via a Gravity Forms form on the site you have connected to. It cannot connect to a Gravity Forms entry if the Stripe transaction was initiated by another service, or if the transaction id was not stored for some reason (e.g. a web hook failure at confirmation).
Click the View Entry link to take you to your WordPress website Forms → Entry Detail view.
View and Add Notes
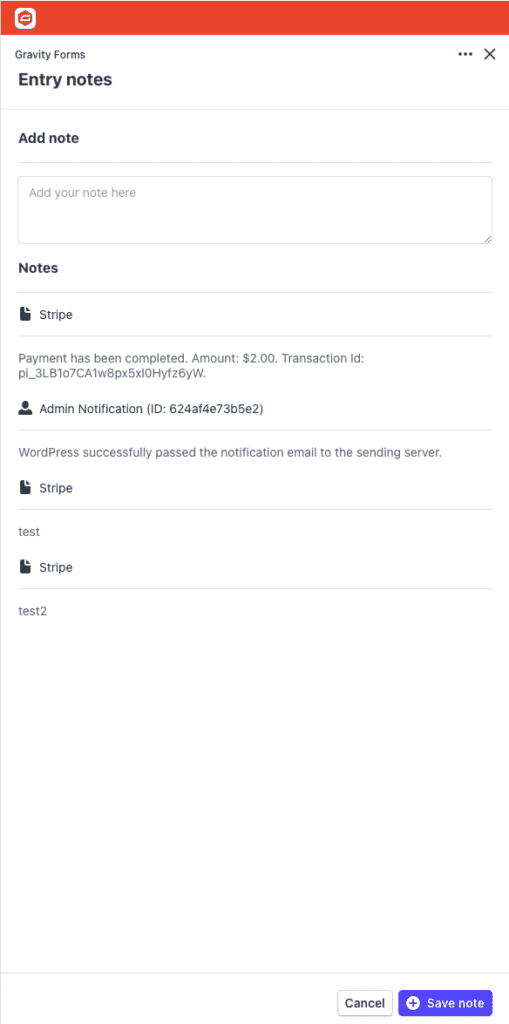
Click the blue View Notes button to switch the side panel to showing the notes that are attached to this entry.

That presents you with a side panel as shown below, which displays notes already added, and an Add New Note field at the top. Add the detail you wish to be associated with this entry, and click the Save Note button at bottom. The notes are saved in your standard WordPress Gravity Forms tables, they are not held by Stripe. Be aware, adding notes requires the gravityforms_edit_entry_notes WordPress permission level.
Notes cannot be edited or deleted from this interface. To do that, switch to your WordPress site and perform it normally using your Forms → Entry Detail screen.
Click the ‘X’ in the top right of the panel to exit Notes view and return to Entry detail view.
Screenshots