Introduction
The process to connect to either is similar, but we have noticed some differences when connecting a test account and using the Skip This Form option. This document explains how to connect to either Mode.
You have two Mode options when connecting Gravity Forms to your Stripe account: Test and Live.
Pre-Requisites
See this guide for all the pre-requisites.
Connect to a Live Account
If connected to the live Stripe environment, any transactions passed will attempt to generate real charges.
- Ensure that two-factor authentication (2FA) is enabled in your Stripe account Settings. For assistance, see this Stripe guide.
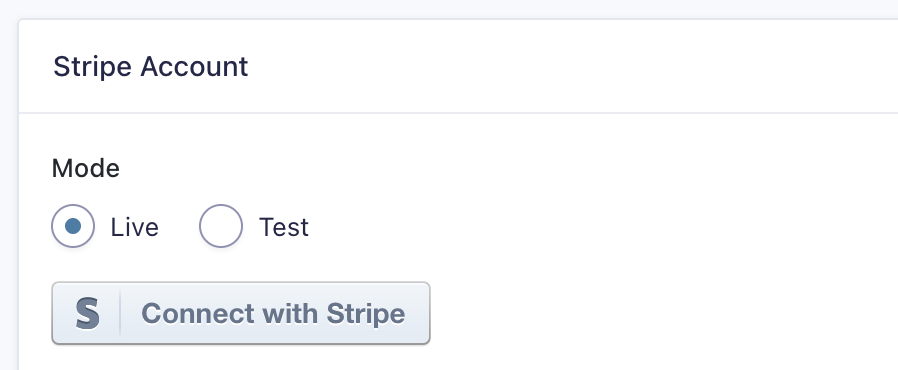
- Navigate to Forms → Settings → Stripe Settings, and look for the Stripe Account section.
- Set the Mode to Live.
- Click the “Connect with Stripe” button.
- You will be presented with the Stripe sign-in page. Complete the sign-in process.
- You should now see a Stripe account selection page (these accounts are created from within your Stripe service dashboard; see this guide). The email address of your Stripe account will be displayed at the top of the page.

- Select the account you wish to use to collect live payments and click the “Connect” button.
- You may be presented with various Stripe forms requesting additional business information if your account is not fully setup for live payment. Complete any information Stripe requires, and then authorize the account to confirm connection to your Gravity Forms.
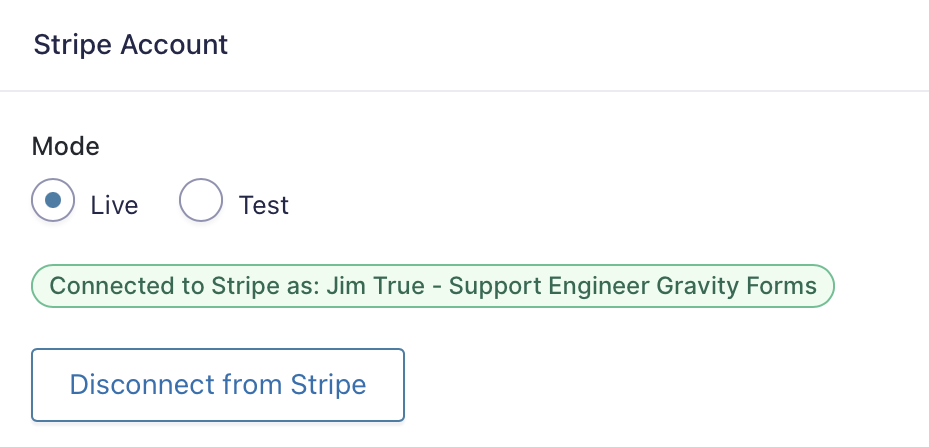
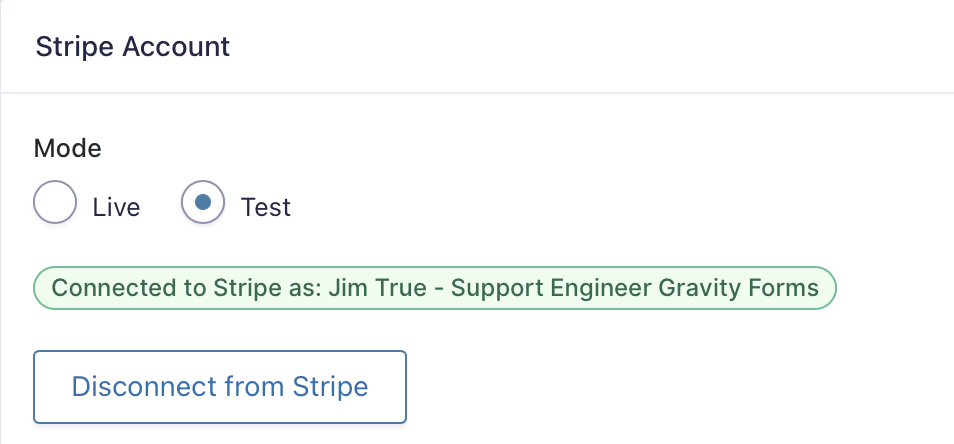
- You will be returned to the Stripe Settings page. You should see “Connected to Stripe as” with your account name as well as a “Disconnect from Stripe” button.
- Continue configuring the Webhooks for this connection; you will be configuring the Live Signing Secret.
Connect to a Test Account
Connecting to a Test account allows you to have a sandbox for testing the passing and behavior of submissions between your form and Stripe, but will not generate real transactions.
If you already have a Stripe account, you will connect it in Test Mode. Only use “Skip this Form” if you do not have a Stripe account and want to try the process in a demo/test environment without linking to an account.
- Ensure that you have two factor authentication (2FA) enabled in your Stripe account Settings. See this Stripe guide for assistance.
- Login to your Stripe account and navigate to your Profile screen (click the icon in the top right corner).
- Go back to your WordPress dashboard, and navigate to your Forms → Settings → Stripe Settings, and look for the Stripe Account section.
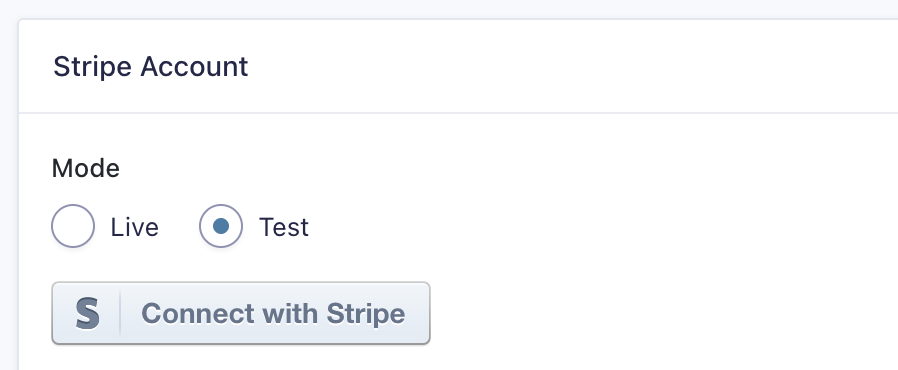
- Set the Mode to Test.
- Click the “Connect with Stripe” button. You will get a “redirecting you to Stripe” screen.
- If you logged into Stripe at Step 1, you should now see a Stripe account selection page (these accounts are created from within your Stripe service dashboard, see this guide). If not, you will bet presented with the Stripe login dialog first.
- Once logged in, this screen shows the email address of your Stripe account, and the words Test Mode, will be displayed at the top of the page. From the list of Stripe accounts provided, choose the account you wish to connect to for testing.

- Click “Connect” to connect your Stripe account in Test Mode.
If you do not have a Stripe account and are only doing a demo, click “Skip this Form” instead.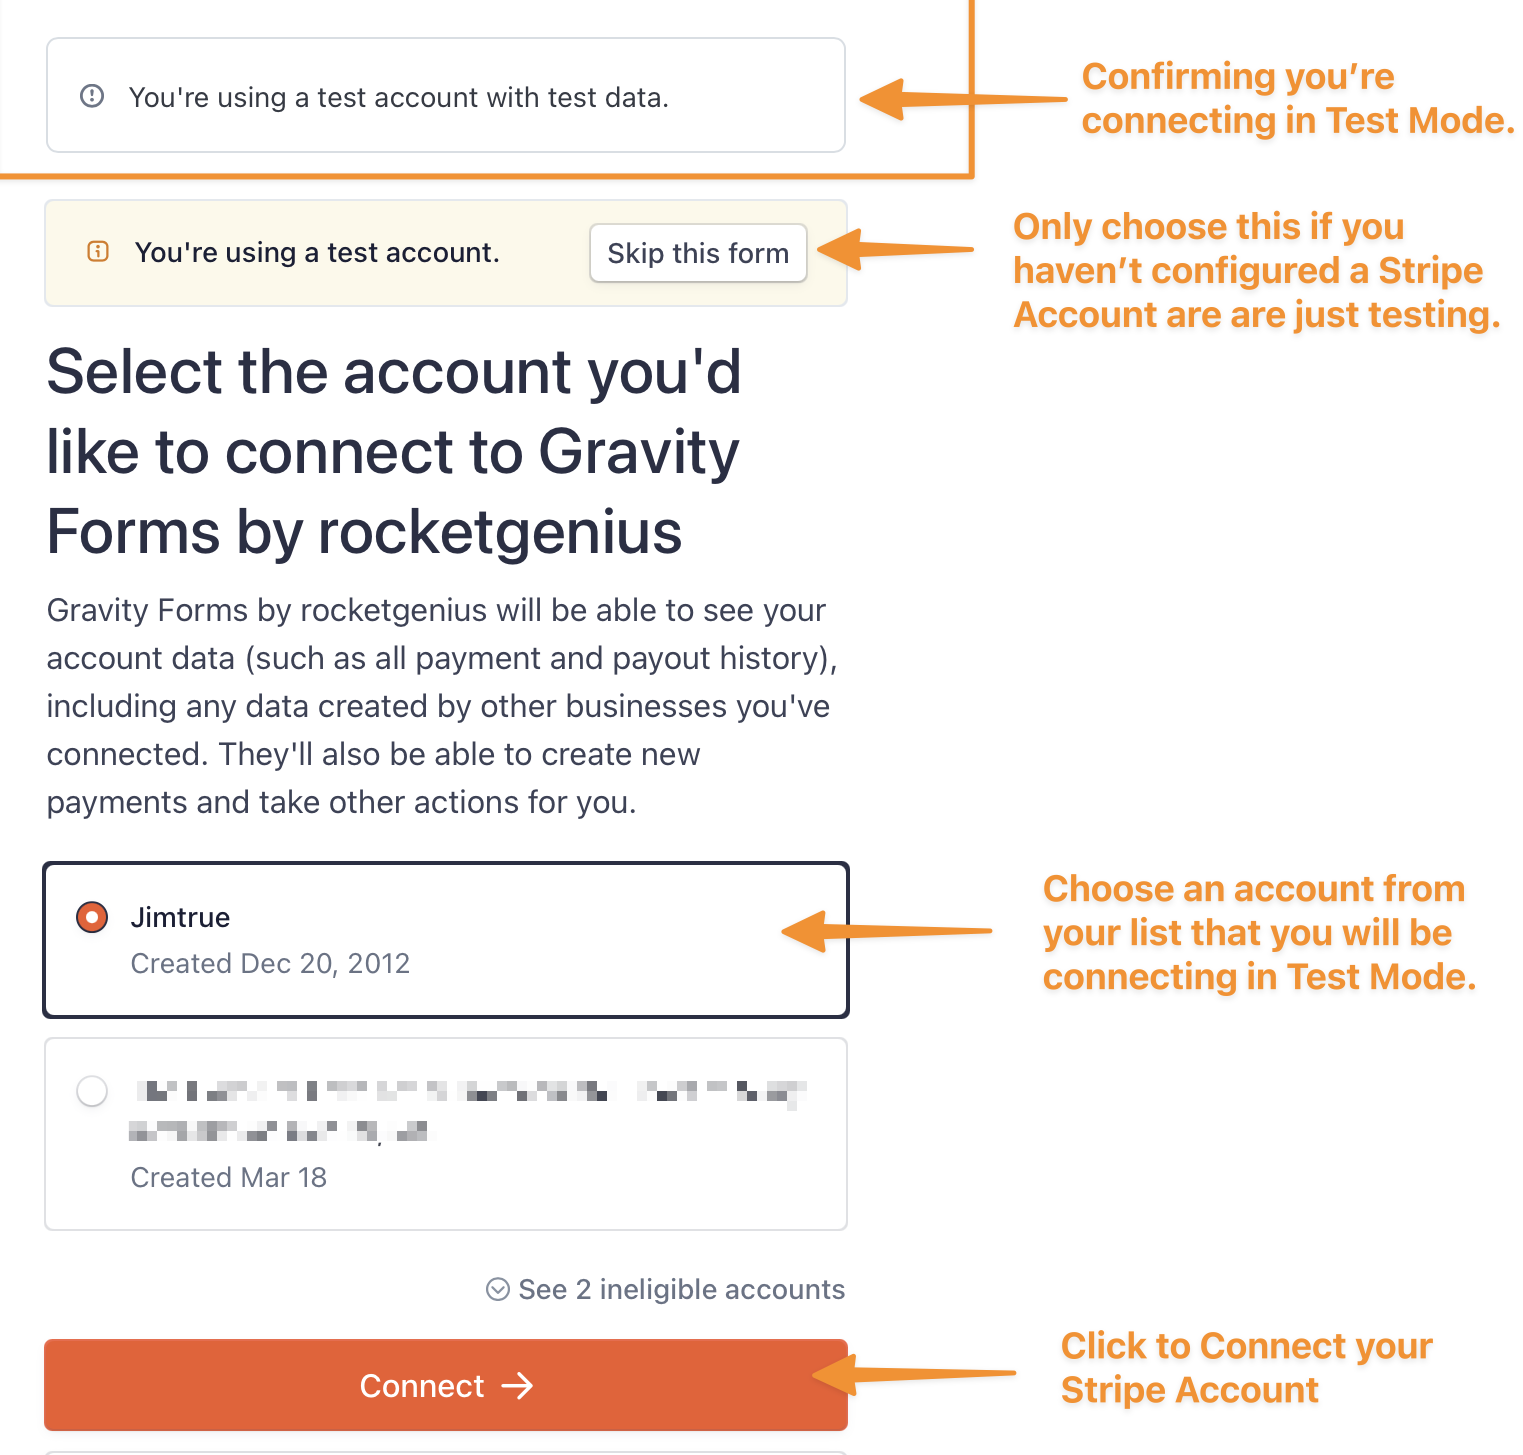
- You should now be redirected back to your Gravity Forms settings page, and see the the Stripe Account panel now says “Connected to Stripe Account…” and the name of the account you chose in step 7 should be displayed.
- Continue configuring the Webhooks for this connection; you will be configuring the Test Signing Secret.
Note: If your Settings screen shows “Unnamed account“, this most likely means you did not have 2FA properly set. This is a newly created anonymous account, but as it is not connected to your account, you cannot see any of the test transactions you run. Disconnect this newly created account and follow the instructions above.
Test Cards
Stripe provides a set of test cards that you can use to test different scenarios. Please check Stripe’s official Testing documentation for more details.