The Challenge
You have two forms. The first form is used to capture general customer information, and the second is used to create a new user account on your site. Instead of creating an account with the first form using the user registration add-on, you would rather only register the user with the second form (maybe that form is used directly ions one circumstances, or the first form only creates the account under certain conditional logic criteria). In such a scenario, it is unfriendly to ask the customer to enter their information twice.
This tutorial covers a method to pass data submitted from the first form over as default values in the second.
How To Solve
The method described here uses query strings passed in the confirmation redirect, which allow you to pre-populate the second form based on the first form’s submission.
In this article, we will show you how to configure your forms and the confirmation such that data from the first form can automatically populate fields on the second form.
Want a simpler (third party) solution?
For an alternative solution that is easier to setup and keeps your URL strings nice and clean, check out the third party plug-in Easy Passthrough from the folks at GravityWiz. They have a detailed “how to” article as well.
Quick Summary
For those that just need a quick summary, these steps may be enough. If not, review the detailed screens below.
In the first form:
- Modify a confirmation of the first form to have Confirmation Type: Redirect.
- Enter the Redirect URL as the web page address of the second form.
- In the Pass Field Data via Query String field enter the query strings you wish to pass in a parameter_name=field_merge_tag format.
In the second form:
- Select a field you want to receive from the first form.
- Check the box for “Allow field to be populated dynamically”.
- Enter the query string you passed into the Parameter Name box for that field.
- Repeat for all passed fields.
Setting up the first form to send data using confirmations
To begin reading data from the first form, it must output the data in some way to allow the second form in the process to read from it. This is where confirmation query strings come into play. In this section, we will show you how to set up confirmation query strings to be passed from the first form to the second.
- First, you will need to access your first form that will be entered by the user. In this example, we will be using a general customer information form. We will be including a Name, Email, Address, Website, and Phone field.
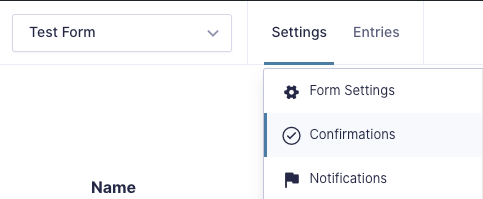
- Next, hover over Form Settings and click on Confirmations. Then click on the Default Confirmation to apply the same redirect to all the submissions for this form. Or optionally create a new confirmation only if you want to use this confirmation based on conditional logic.
- Once here, select the Redirect option for the Confirmation Type. This is because instead of simply displaying a confirmation message, we need to redirect data to the secondary form.
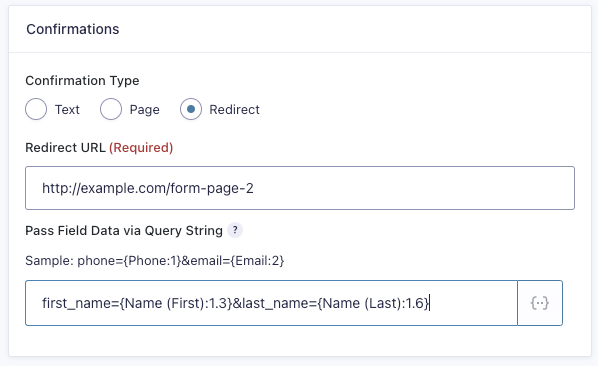
- In the Redirect URL field, enter the URL of your secondary form. If you have not already created a second form, go ahead and do so as well as embed it within a page and obtain the URL for that page.
- The Pass Field Data via Query String field will be formatted such a way that you will have a variable containing a variable. The contents of these variables will be populated using merge tags. For example, it will look something like this:
first_name={Name (First):1.3}&last_name={Name (Last):1.6}
In the example above, we are creating variables for first_name and last_name, and assigning them to the corresponding submitted fields using merge tags. As we have multiple variables here, they are separated with an & symbol. To review and insert available merge tags, click the merge tag icon to the right of the field. - Once all of your fields are configured to send the appropriate query strings to your secondary form, save your settings and continue on to the next steps to set up the second form that will receive the submitted data from the first.
Setting up the second form to receive the submitted data
Now that your first form is configured properly to send the submitted data via a query string, you will now need to set up the second form the receive that data and automatically populate fields from it.
- Begin by accessing the second form that will receive data from the first.
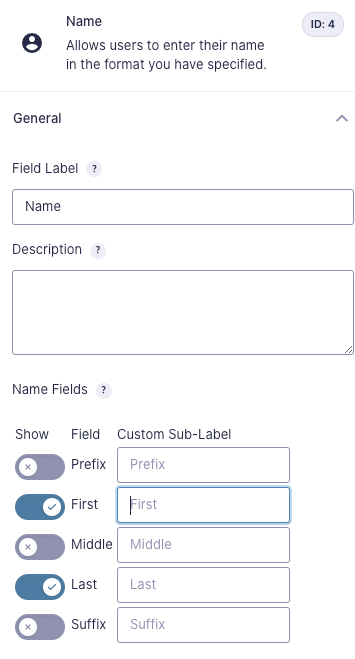
- Once you have done so, select a field that you would like to be automatically populated. In the screenshot below, we would like the Name field to be automatically populated.
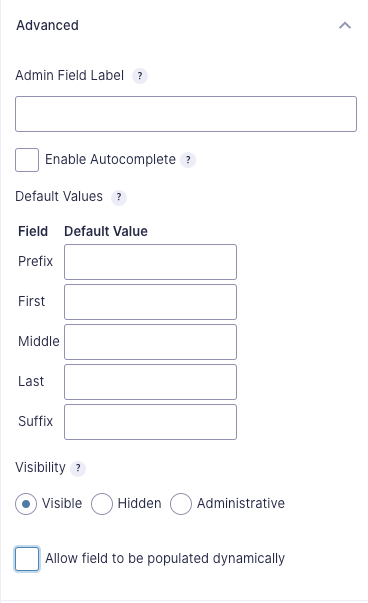
- From within your selected field, click on the Advanced tab and select the checkbox labeled Allow field to be populated dynamically. This will allow the field to become populated based on the data sent to it.
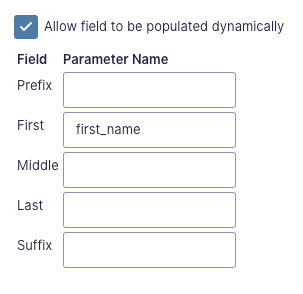
- Now that dynamic population has been enabled for this field, you will simply need to map the query string variables that are sent in the first form, to be accepted and used in the second form. In the prior example that we used, the First Name field was set to the first_name query string variable. To allow the second form to accept and use this query string, simply enter first_name into the box labeled First, under Parameter Name. Of course, the exact information you will enter here will vary based on the query strings that you have created earlier.
- That’s all there is to it. Any fields you configure this way will now become automatically populated based on the content you have configured them to receive from the initial form submission.
You should now have a solid understanding of how to dynamically populate a form based on another form’s submission.