Introduction
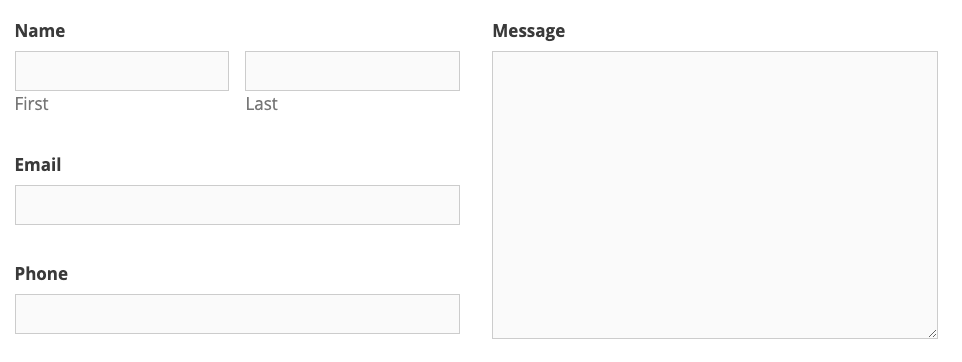
The article shows you how to line up fields so that one column field takes up the same vertical space as a multiple fields in an adjacent column. Hard to describe, so let’s show a picture!
This technique is for Gravity Forms 2.5 and later only.
Quickstart Guide
- Add a Name field and Textarea field side by side in the form.
- Add an Email field and Phone field side by side in the form.
- Add a Custom CSS class to the Textarea field under Field Settings > Appearance > Custom CSS ie
gform-field-row--span-three - Save the Form and Add the form to your website.
- Add the following CSS to your website:
.gform-field-row--span-three {
grid-row: span 3;
}
Setup the Fields
In our example, we are setting up a two column view, where the leftmost column will hold multiple fields, and the right most column will hold one field that takes up the same vertical space as the left column.
In the column editor, drag and drop side-by-side the first field for the leftmost column, and then the field that will end up spanning multiple rows on the right column. This will automatically set the width of those two fields to half the grid each.
In our example, that means adding a Name field and a Textarea field side-by-side in the editor
Next, drag and drop side-by-side the two fields that will eventually fill the rest of the leftmost column. Putting them next to each other in columns will ensure they are half-width each. They will be “reflowed” into the left column with some CSS later.
In our example, this is adding an Email field and a Phone field side-by-side in the row below the first two fields.
Add a CSS Class to the Spanning Field
To bring the fields into the alignment we desire, you will need to add a custom CSS style to the field, and then set some properties for it in your theme file.
Taking advantage of the Custom CSS Class settings, go into the Textarea field in the form and select it to then click the tab for Appearance. This will reveal the Custom CSS Class setting 1. In this field, add a CSS Class name that you will remember. For example, span-three-rows or row-span-three or gform-field-row--span-three. It is up to you, just remember what you chose for later.
In our example, we will use gform-field-row--span-three, adding it to the Custom CSS for the Textarea field under Field Settings, Appearance, Custom CSS Class. Save the form.
Add a CSS Span Property to your Theme
Now that we have named the element, we need to tell the Theme file how to treat it, in this case specifically using the span property. The easiest way will be to add this to the Customizer in Theme Options. There are other ways to add CSS to your theme. The following line is what you will add to your Theme’s CSS:
.gform-field-row--span-three {
grid-row: span 3;
}
Here’s how this works: the .gform-field-row--span-three identifies the class and makes the action specific to any objects with that class. The grid-row is a CSS Grid property, and the span 3 is telling the CSS to span 3 grid rows for any object with the class gform-field-row--span-three. Simple!
Add the CSS snippet above to the Additional CSS section of the Customizer.
Want to learn more about CSS Grid?
If you’d like to learn more about CSS Grid and how Gravity Forms is using it in version 2.5, check out these articles:
- An alternative to using Custom CSS Class Settings is to inspect your form after configuring and putting it into a page, and then seeing what the field id is for the Textarea field so you can specifically target just that field with your CSS. ↩