Summary
This article explains how you can chain two forms together by placing the shortcode for another form inside the confirmation of the first form.
This results in the second form displaying upon submission of the first form. Data from the first form may be carried over to the second using parameters.
Steps
Below are the steps to follow:
- Create the first form.
- Edit the Confirmation
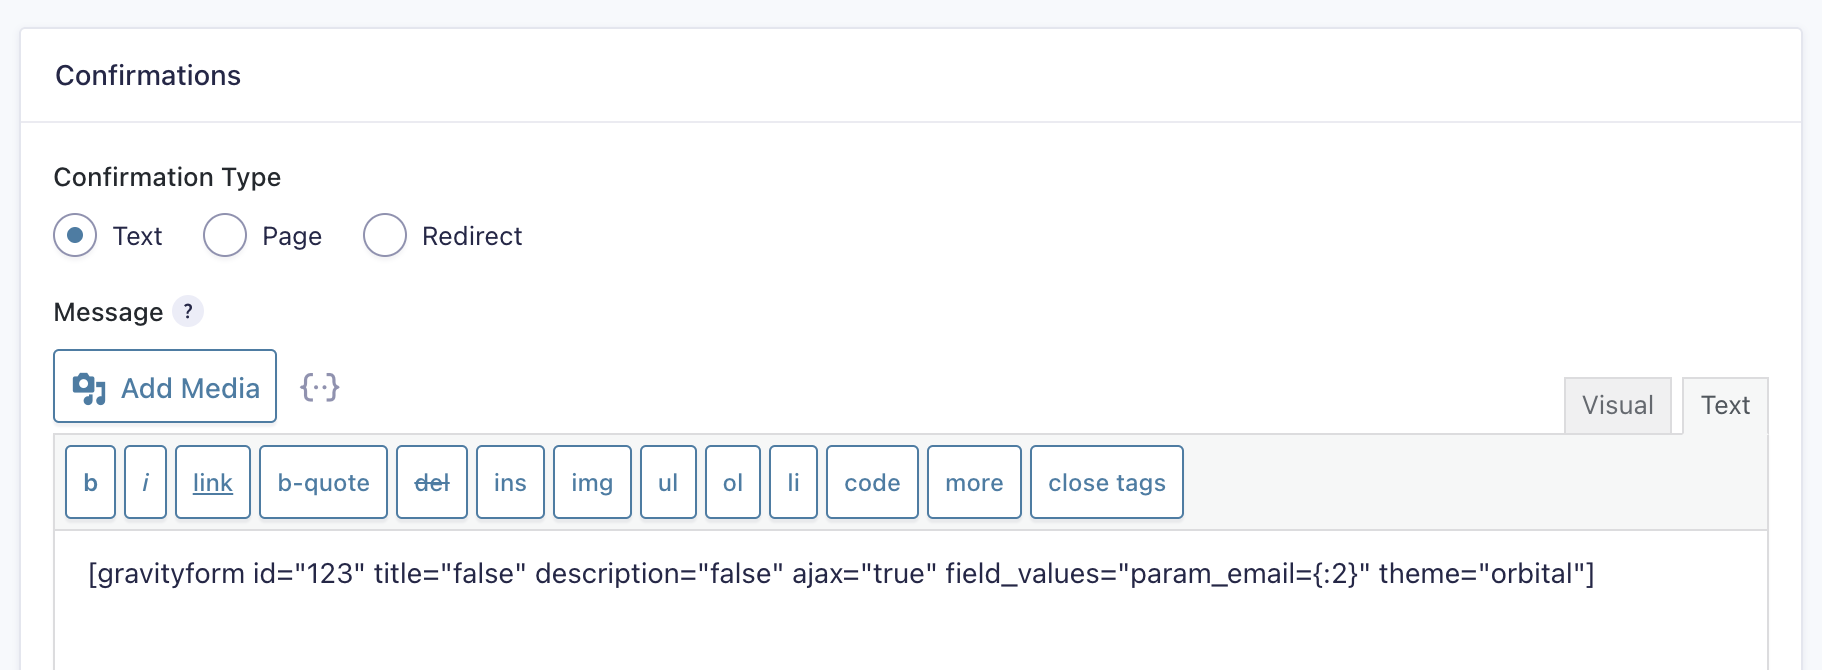
[gravityform id="123" title="false" description="false" ajax="true" field_values="param_email={:2}" theme="orbital"]
Note: The ajax attribute must be included and set to true for the shortcode to the second form. If not, upon submission of the second form, the first form will load again.
Note: Styles from Form 1 can impact Form 2. Set the theme attribute in the shortcode for Form 2 to match the theme used in Form 1. Refer to this article for more information about the shortcode attributes.
Populating Fields
To transfer data and populate fields on the second form, you need to include the field_values attribute in the shortcode. Make sure that the parameter names used match those created in the second form. The values will depend on the field IDs assigned to the second form. If you’re unsure about the field IDs or parameter names, you can complete this step after the second form has been set up.
Refer to this article for information on the field_values attribute. Additionally, this article provides details about transferring data between forms using query strings.
- Create a page for the first form.
- Add the shortcode for the form to the page. The most important part here is that the ajax attribute is set to false, or not included because it defaults to false. If ajax is set to true, then submitting the second form will cause the first form to be loaded again.
[gravityform id="123" title="false" description="false" ajax="false" field_values="param_email={:2}" theme="orbital"]
- Create a page for the first form.
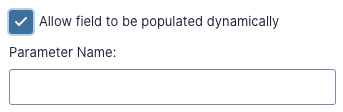
- Create the second form. If there is any data that should carry over from the first form to be displayed in fields on the second form, set the fields on the second form to Allow field to be populated dynamically and enter a Parameter name.
After following the steps above, load the page of the first form and submit. The second form displays with any chosen data populated. Submit the second form and its confirmation page displays.
Bonus: When the second form is submitted, the header from the first form still displays. This can be removed by doing the following:
- Add an HTML field to the second form.
- Add the following code to the Content. This jQuery code simply finds the HTML “h1” tag and replaces the text with nothing. The page header is inside the “h1” tag so it is removed. The script can be modified to target a specific element in the page as needed.
<script type="text/javascript">
var $ = jQuery.noConflict();
$("h1").text('');
</script>
Caveats
It is not possible to chain a form in the confirmation message of a Conversational Form. As a workaround, you can:
- Embed Form 2 on a page and select it as the page in the Form 1 confirmation.
- Enable Conversational Forms for Form 2 and enter its URL in the Form 1 confirmation redirect